
The lace-up clothing trend doesn’t seem to be fading, and I am thrilled. I actually feel a little odd calling it a trend at all since it’s far from new, but that’s a fashion feud for another day. Not only does lace-up clothing offer a fun peek of skin, but it creates loose-fitting clothing, AKA my favorite style of apparel.
Some people can pull on an item, feel it’s a bit snugger than it used to be and keep on living. I am not one of those people. Once an item feels tight, it makes its way to my maybe area where it either fits again due to stretching/de-bloating/both, or it ends up in a garage sale box. I can’t handle it. It almost always makes me feel claustrophobic. It feels like my clothing is trying to kill me by slow hugs and it’s the worst.
But if you think about it, adding a sexy lace-up is just a cuter way to let out tight clothes. See? I’m spinning size changes into a positive. It’s all about that perspective.
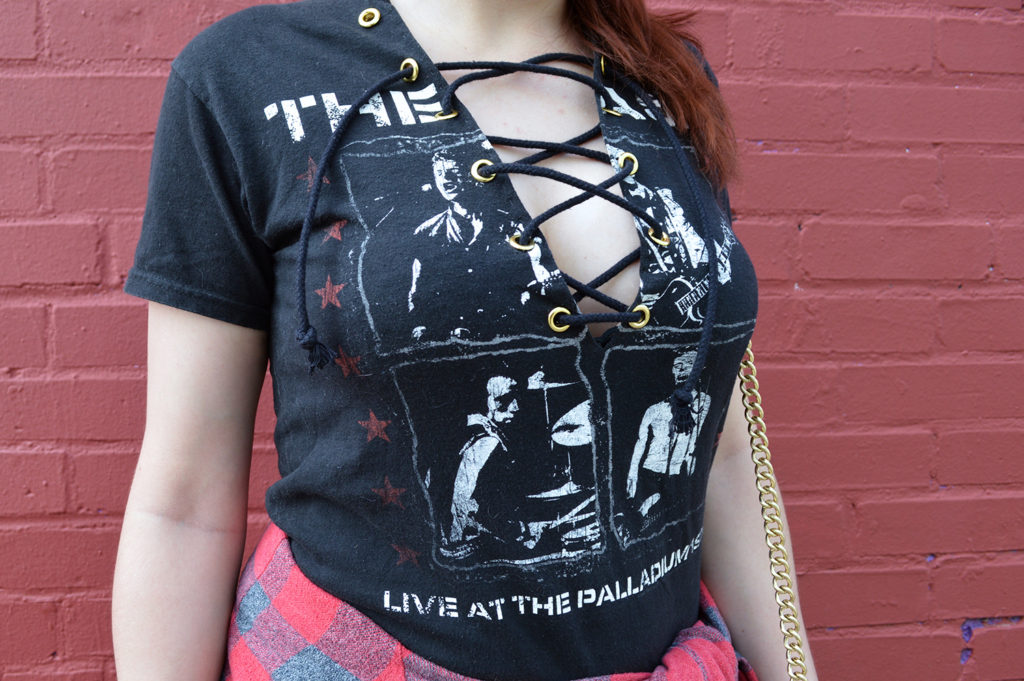
Let’s take, for example, this shirt I bought as a teenager. I worked at Hot Topic in high school and college. Add that to the fact that I spent every available evening at a show and I ended up with a crazy amount of black band tees, most of which have lived in this old bowling bag for the past six or so years because as an almost 30-year-old (sob) I’m not a size Youth Medium anymore.
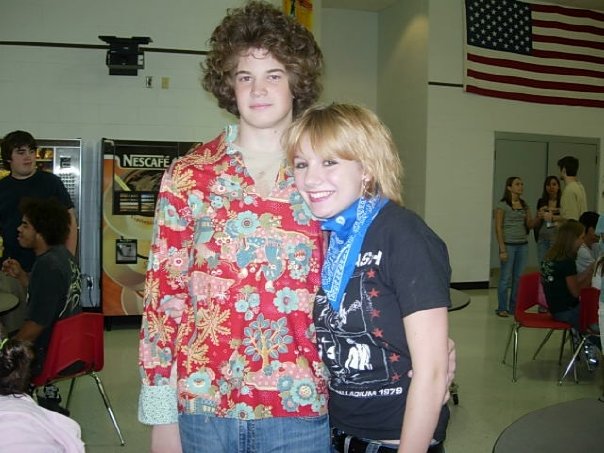
This photo was taken when I was 16 years old on decades day at school. The junior class got the 1970s, but to be honest this is pretty much how I dressed all the time: jeans, black band tee, bandana, messy short hair. That is not, however, how my friend Alex normally dressed, although to be honest I still think it’s a good look on him. He’s now in this rad band called Frankie & the Witch Fingers which, in my opinion, has a 1960s-1970s sound. FULL CIRCLE GUYS.
Oh, and I know, I used to have poorly dyed blonde hair. I may or may not let another drunk girl bleach my hair at a party. Learn from my mistakes, children. It took so many years to fix.
Back to the point.
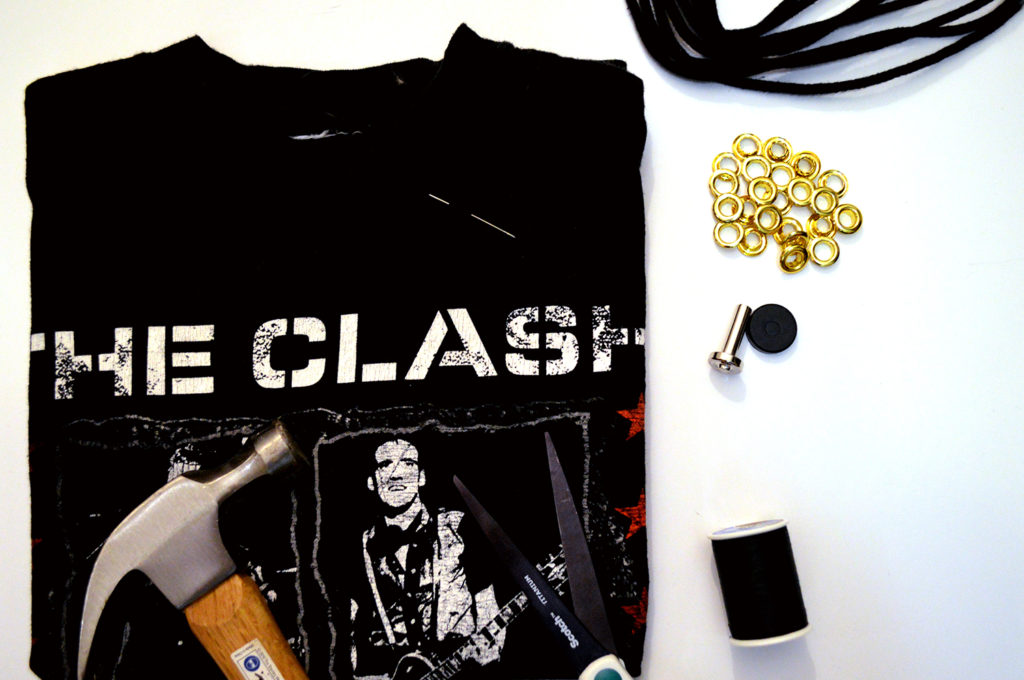
While part of me would certainly like to be the same size I was eleven years ago (!!!) I’m not. This shirt became so tight in the chest I couldn’t move my arms, so it was transported to the box where it sat for many years. I took it out the other day for this project and it still smelled like my mom’s house, which was sort of insane. After a few minutes of nose-induced memories I grabbed the scissors and got to work. Let’s make a DIY lace-up band tee!
Materials
- Grommet kit
- Hammer
- Scissors
- Needle and thread
- Straight pins
- Cord
- Marker
Directions
Cut a line where you’d like the item to lace, then fold back the edges and pin them into place so you have an open V shape. You can make this as narrow or wide as you want depending on how much skin you want to poke through This shirt is pretty snug, and I like showing off the girls, so I went with a wide V neck.
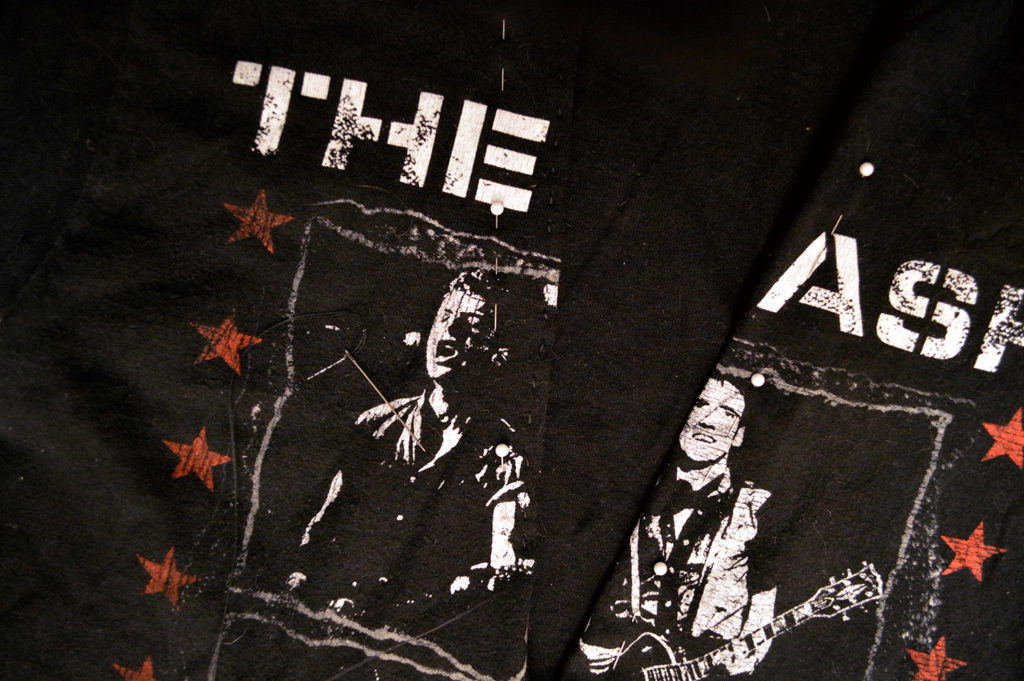
Oh, and never mind all that cat hair. I did this on the floor so the shirt was doomed.
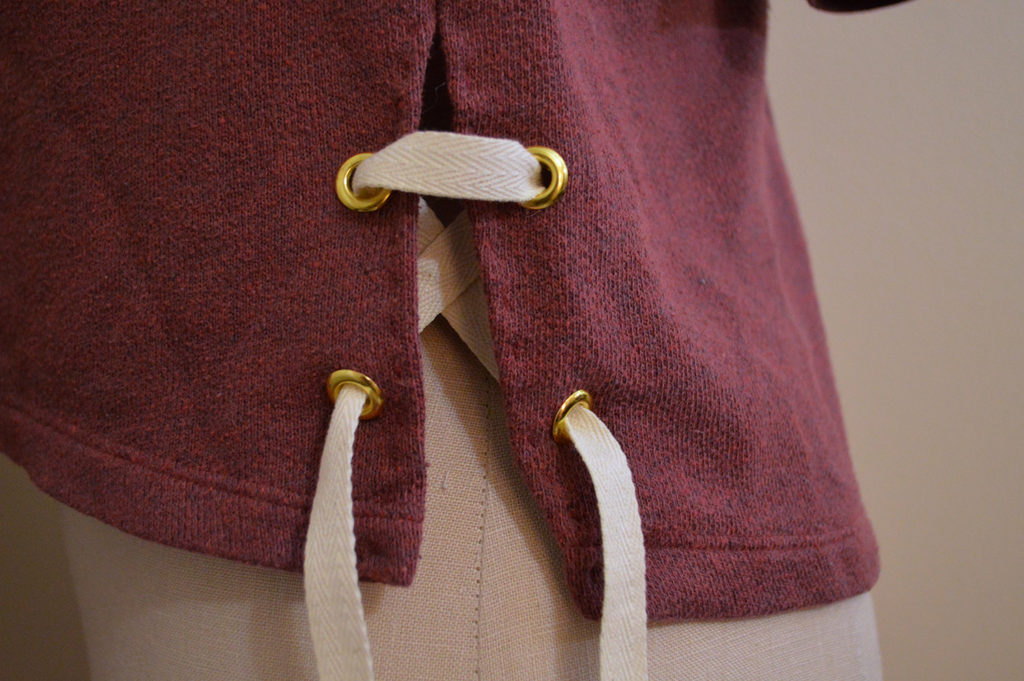
Once your edges are stitched into place, decide where you want your grommets to go and leave a dot with a marker. Poke through or snip the spot using your scissors, remembering to make the hole small so you can stretch it over the grommet. You can always make it bigger if you need to! Place the grommet through the front side, add the washer (the shorter one) to the back, and hammer into place using the grommet tools.
Your kit should come with directions and they vary based on what is included, but more or less you’ll just use place a little metal piece onto the back, push a tool through the hole and hammer it into place a few times. That bends the edges into place and keeps the pieces together. You can also always buy a grommet tool, but if you wanted to drop more money you wouldn’t be fixing up old clothes.
Once all your grommets are in place, lace in the cord and lint roll away all that cat hair.
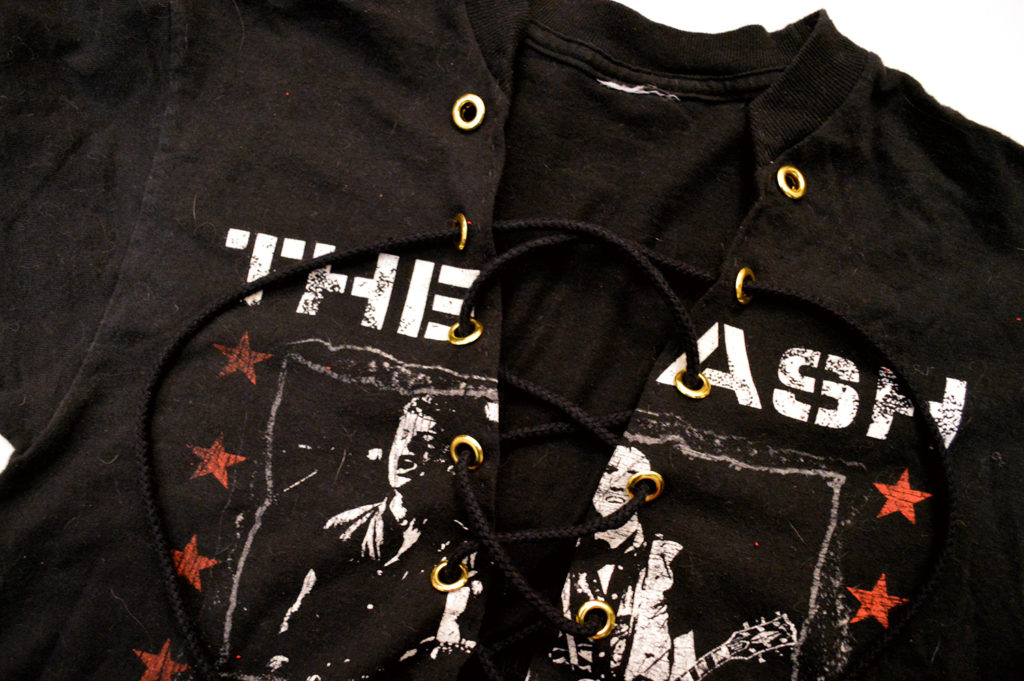
Whoops, my shirt says The Ash now. Sorry, boys, but it wasn’t doing anyone any good sitting in that box. Be careful, though – things could get awkward if you did this with, say, a Crass shirt. Or hilarious. Depends on your mood I guess.
![]()
![]()
Boobies ahoy! Ha!
Oh, and guess what! This tutorial works on a ton of things besides band tees. I’m hoping to cut up a loose, drapey shirt in the future but I didn’t have one on hand that I wanted to alter. I did, however, have a denim dress that could use some excitement…
![]()
…and an old pullover sweatshirt that had made its way to the garage sale box.
You can use pre-existing necklines as a template for your grommets or add slits along the back or side-seams of nearly any item for extra room or a bit more visual interest. The whole thing takes maybe twenty minutes.
Off to dig through my closet for more boring old clothes in need of an upgrade!

