
Are you itching for a craft? Do you have two to three hours to kill? Got 15-or-so bucks and a pocket full of coupons? Then you’re ready.
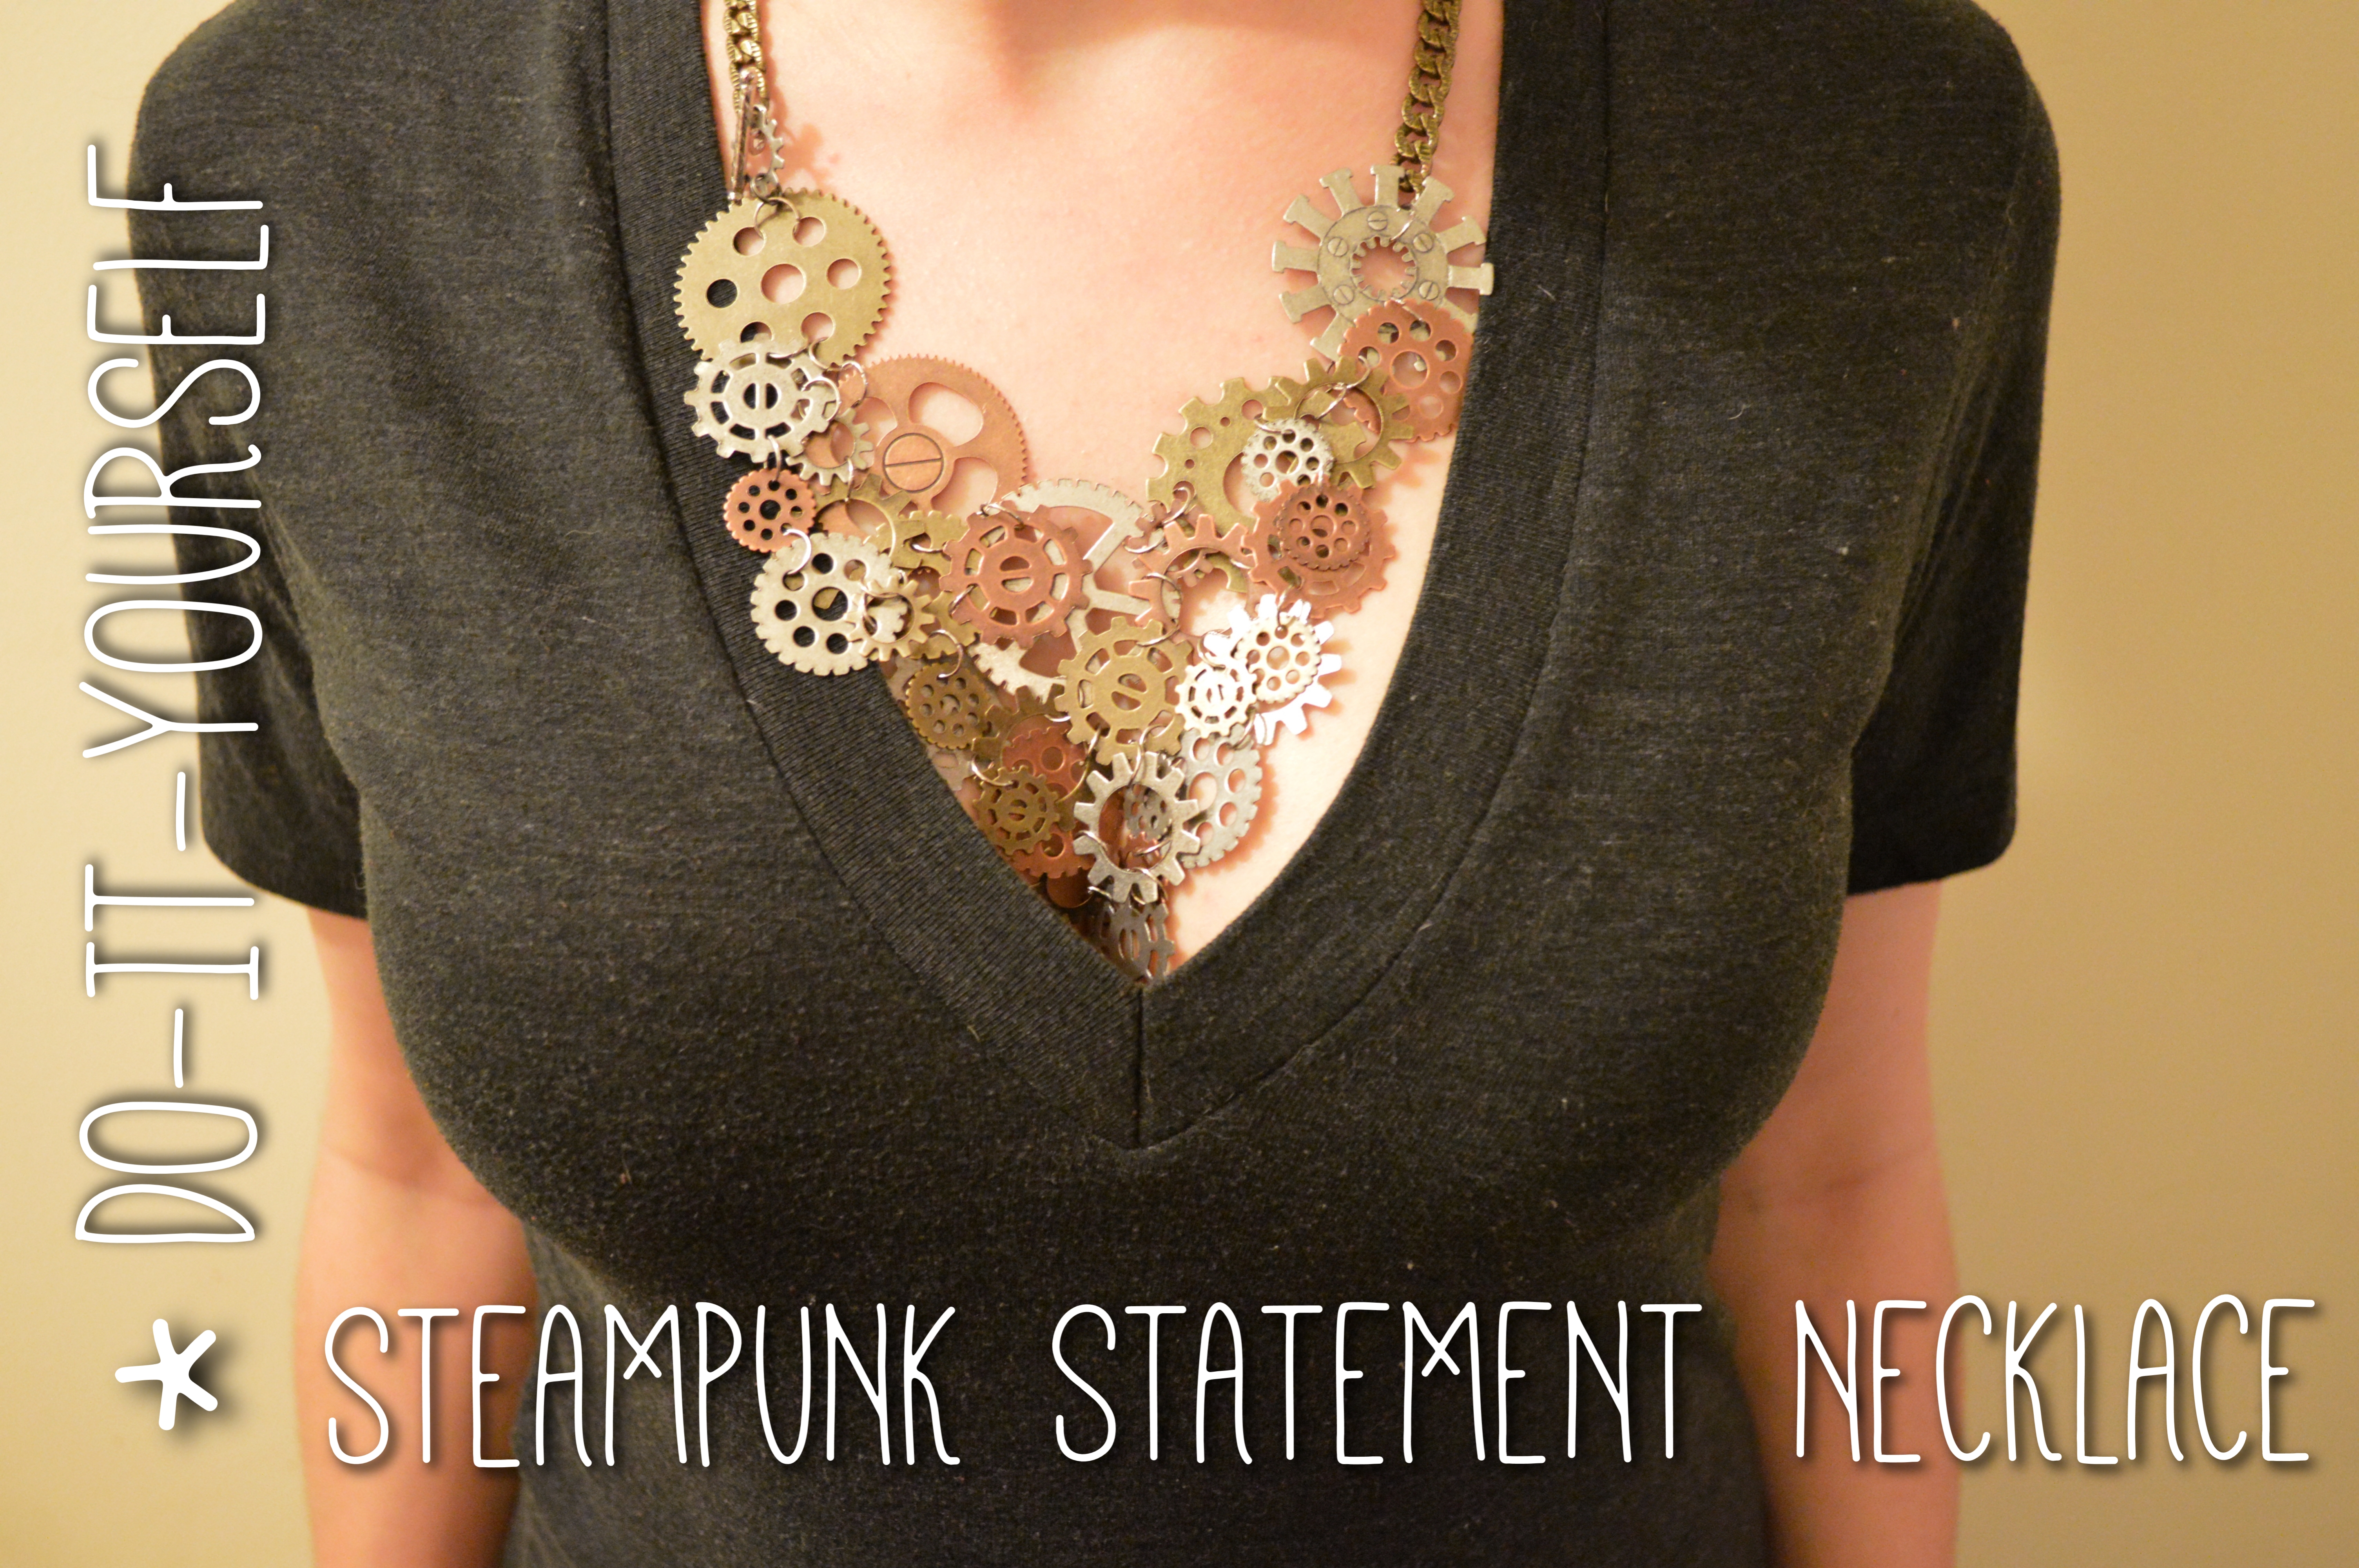
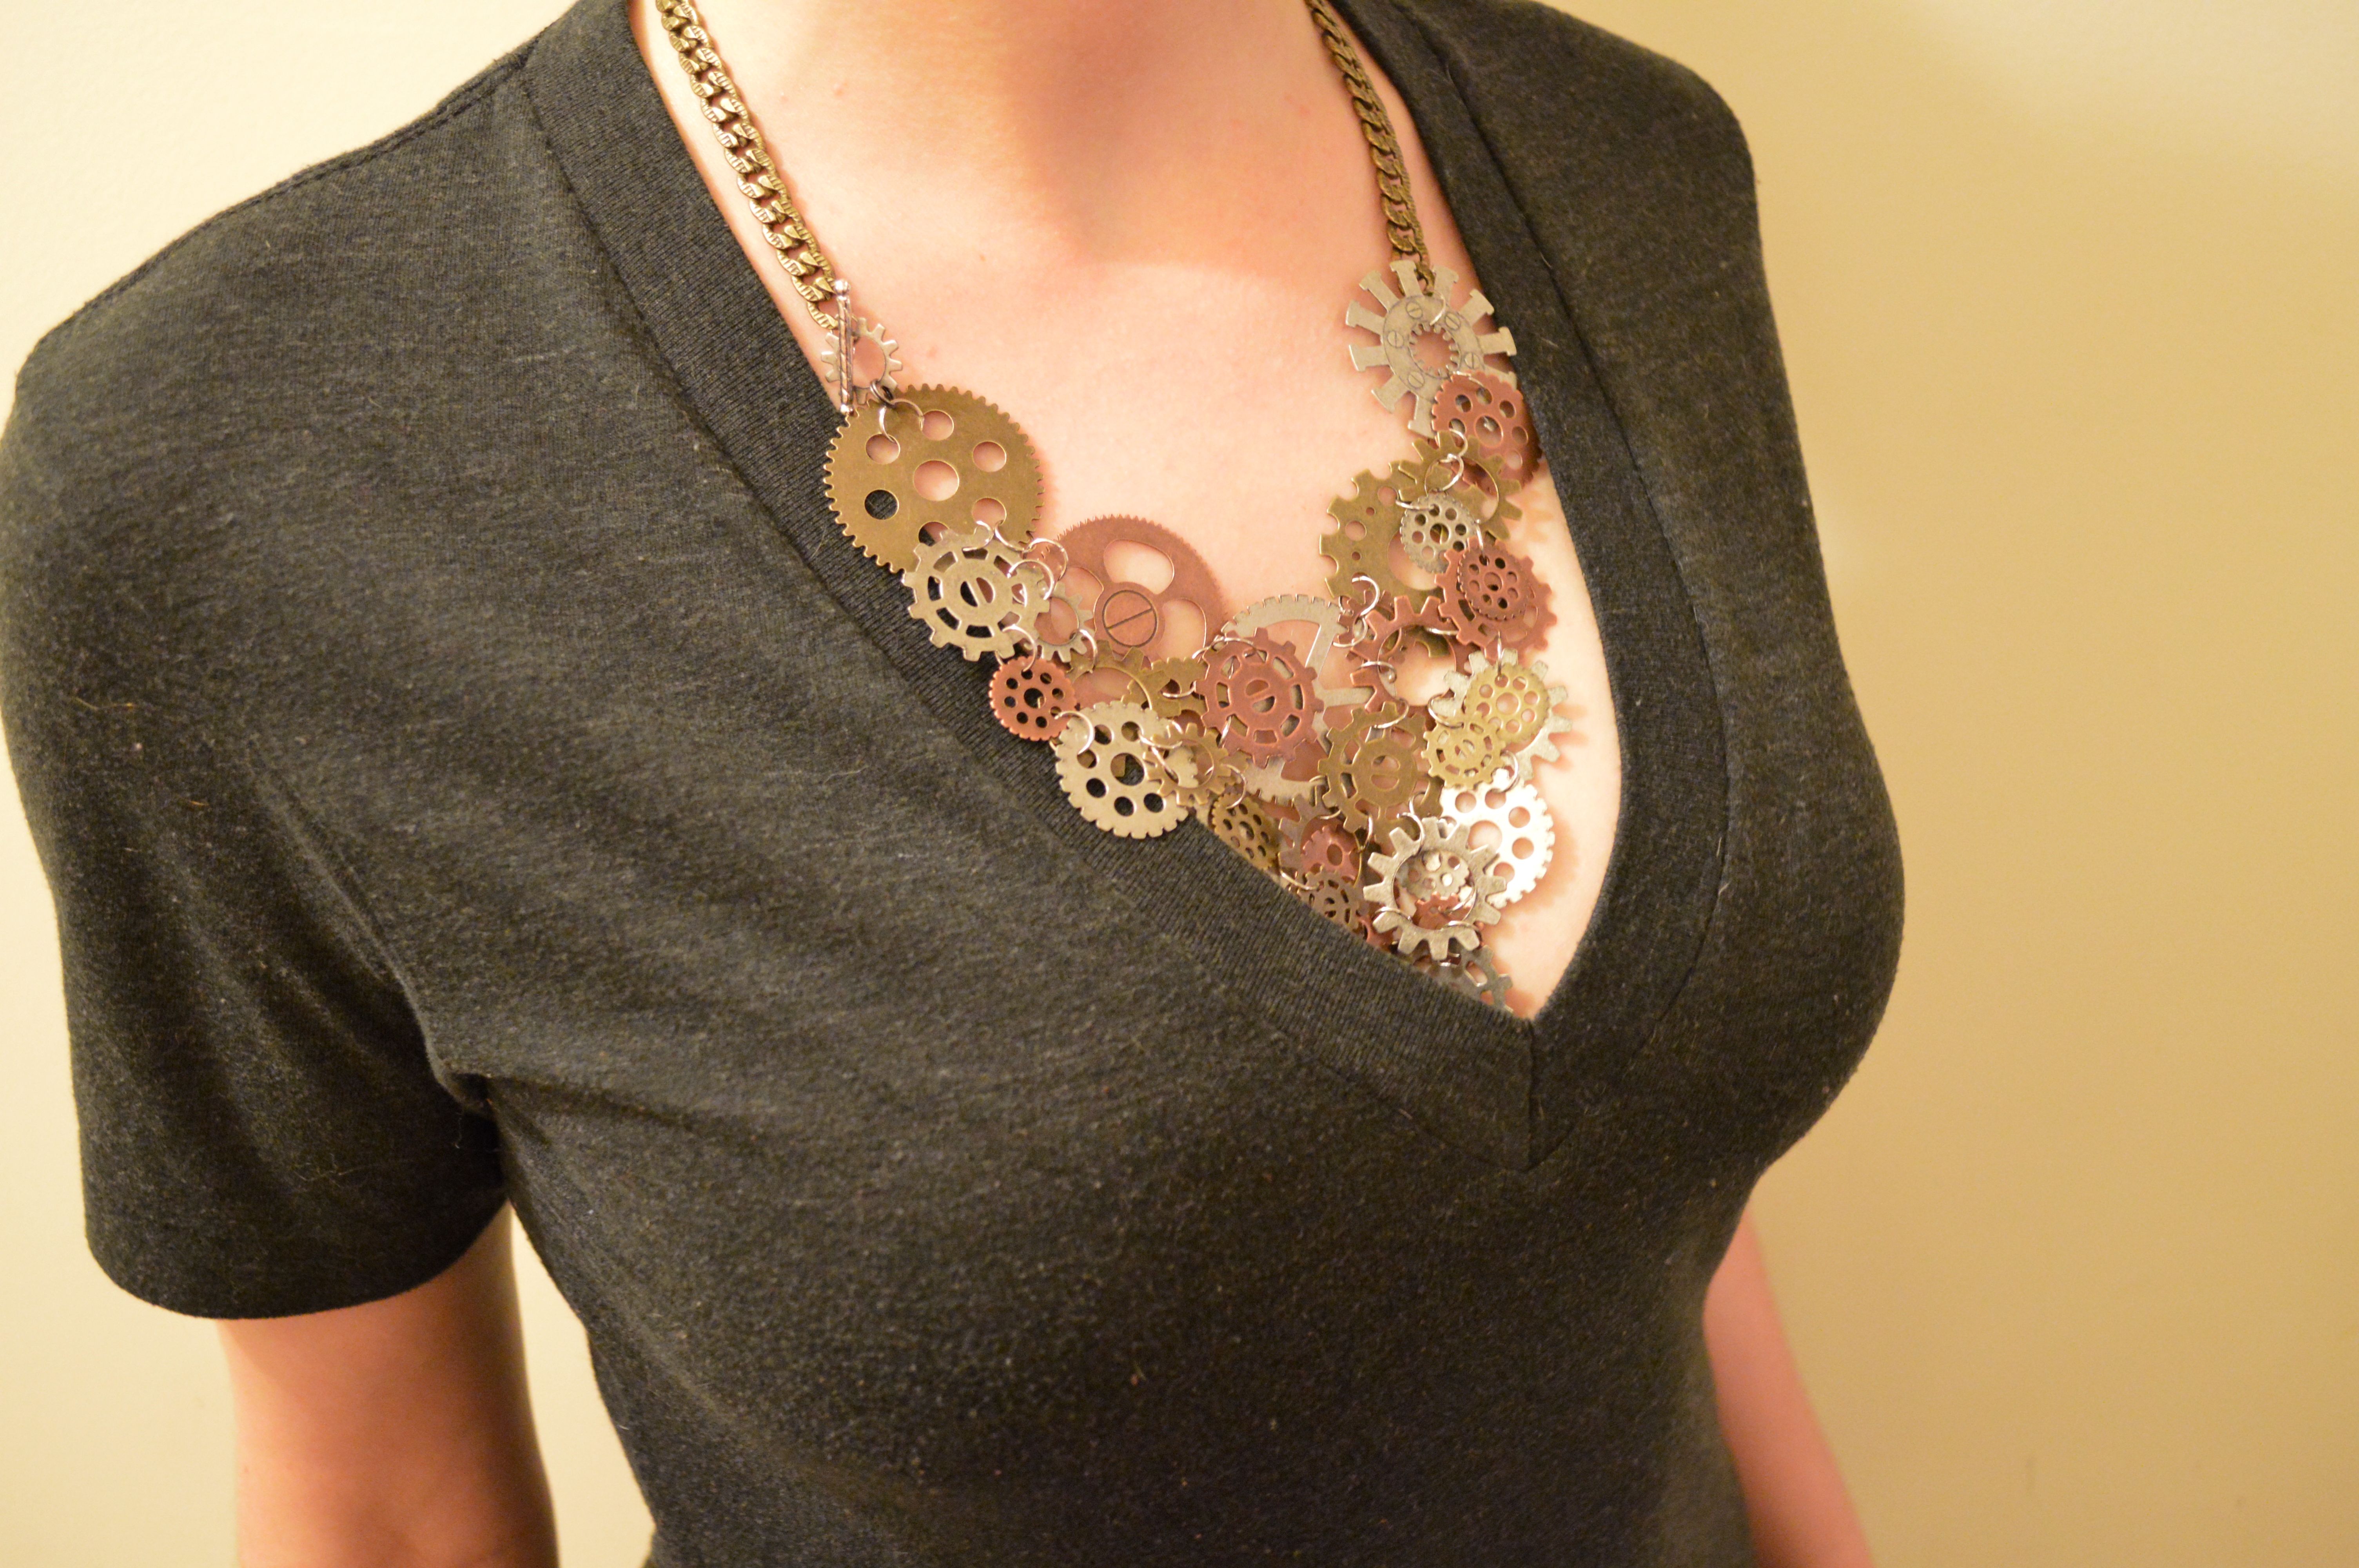
Steampunk-inspired accessories seem to be everywhere. Anyone who likes a rough or industrial edge in design can appreciate a few gears or sprockets, and my latest project is literally full of them.
Okay, dolls, let’s begin!
The Steampunk Statement Necklace
Here’s what you’ll need…
PSSST! Notice the coupons? You’ll need a friend and/or separate trips to use that many coupons at Michaels. However, there are some great deals going on this week! Find all coupons on the Michaels website or in your local newspaper. And don’t forget to grab the coupon (mine was 40% off) that prints with your receipt!
- Large gears [HERE] | Use one 40% off one item coupon
- Small gears [HERE] | Use one 40% off one item coupon
- Thick chain [SIMILAR] | Use 30% off entire jewelry-making purchase coupon
- Jump rings [A variety of THESE] | Use 30% off entire jewelry-making purchase coupon
- Toggle clasp [SIMILAR] | Use 30% off entire jewelry-making purchase coupon
- Pliers and wire cutters [SIMILAR] | Use 30% off entire jewelry-making purchase coupon
- OPTIONAL: Charms (Like locks and keys, which I planned on using, then decided I preferred it without. Up to you!)
Here’s what you’ll do…
Ready? Set? Begin!
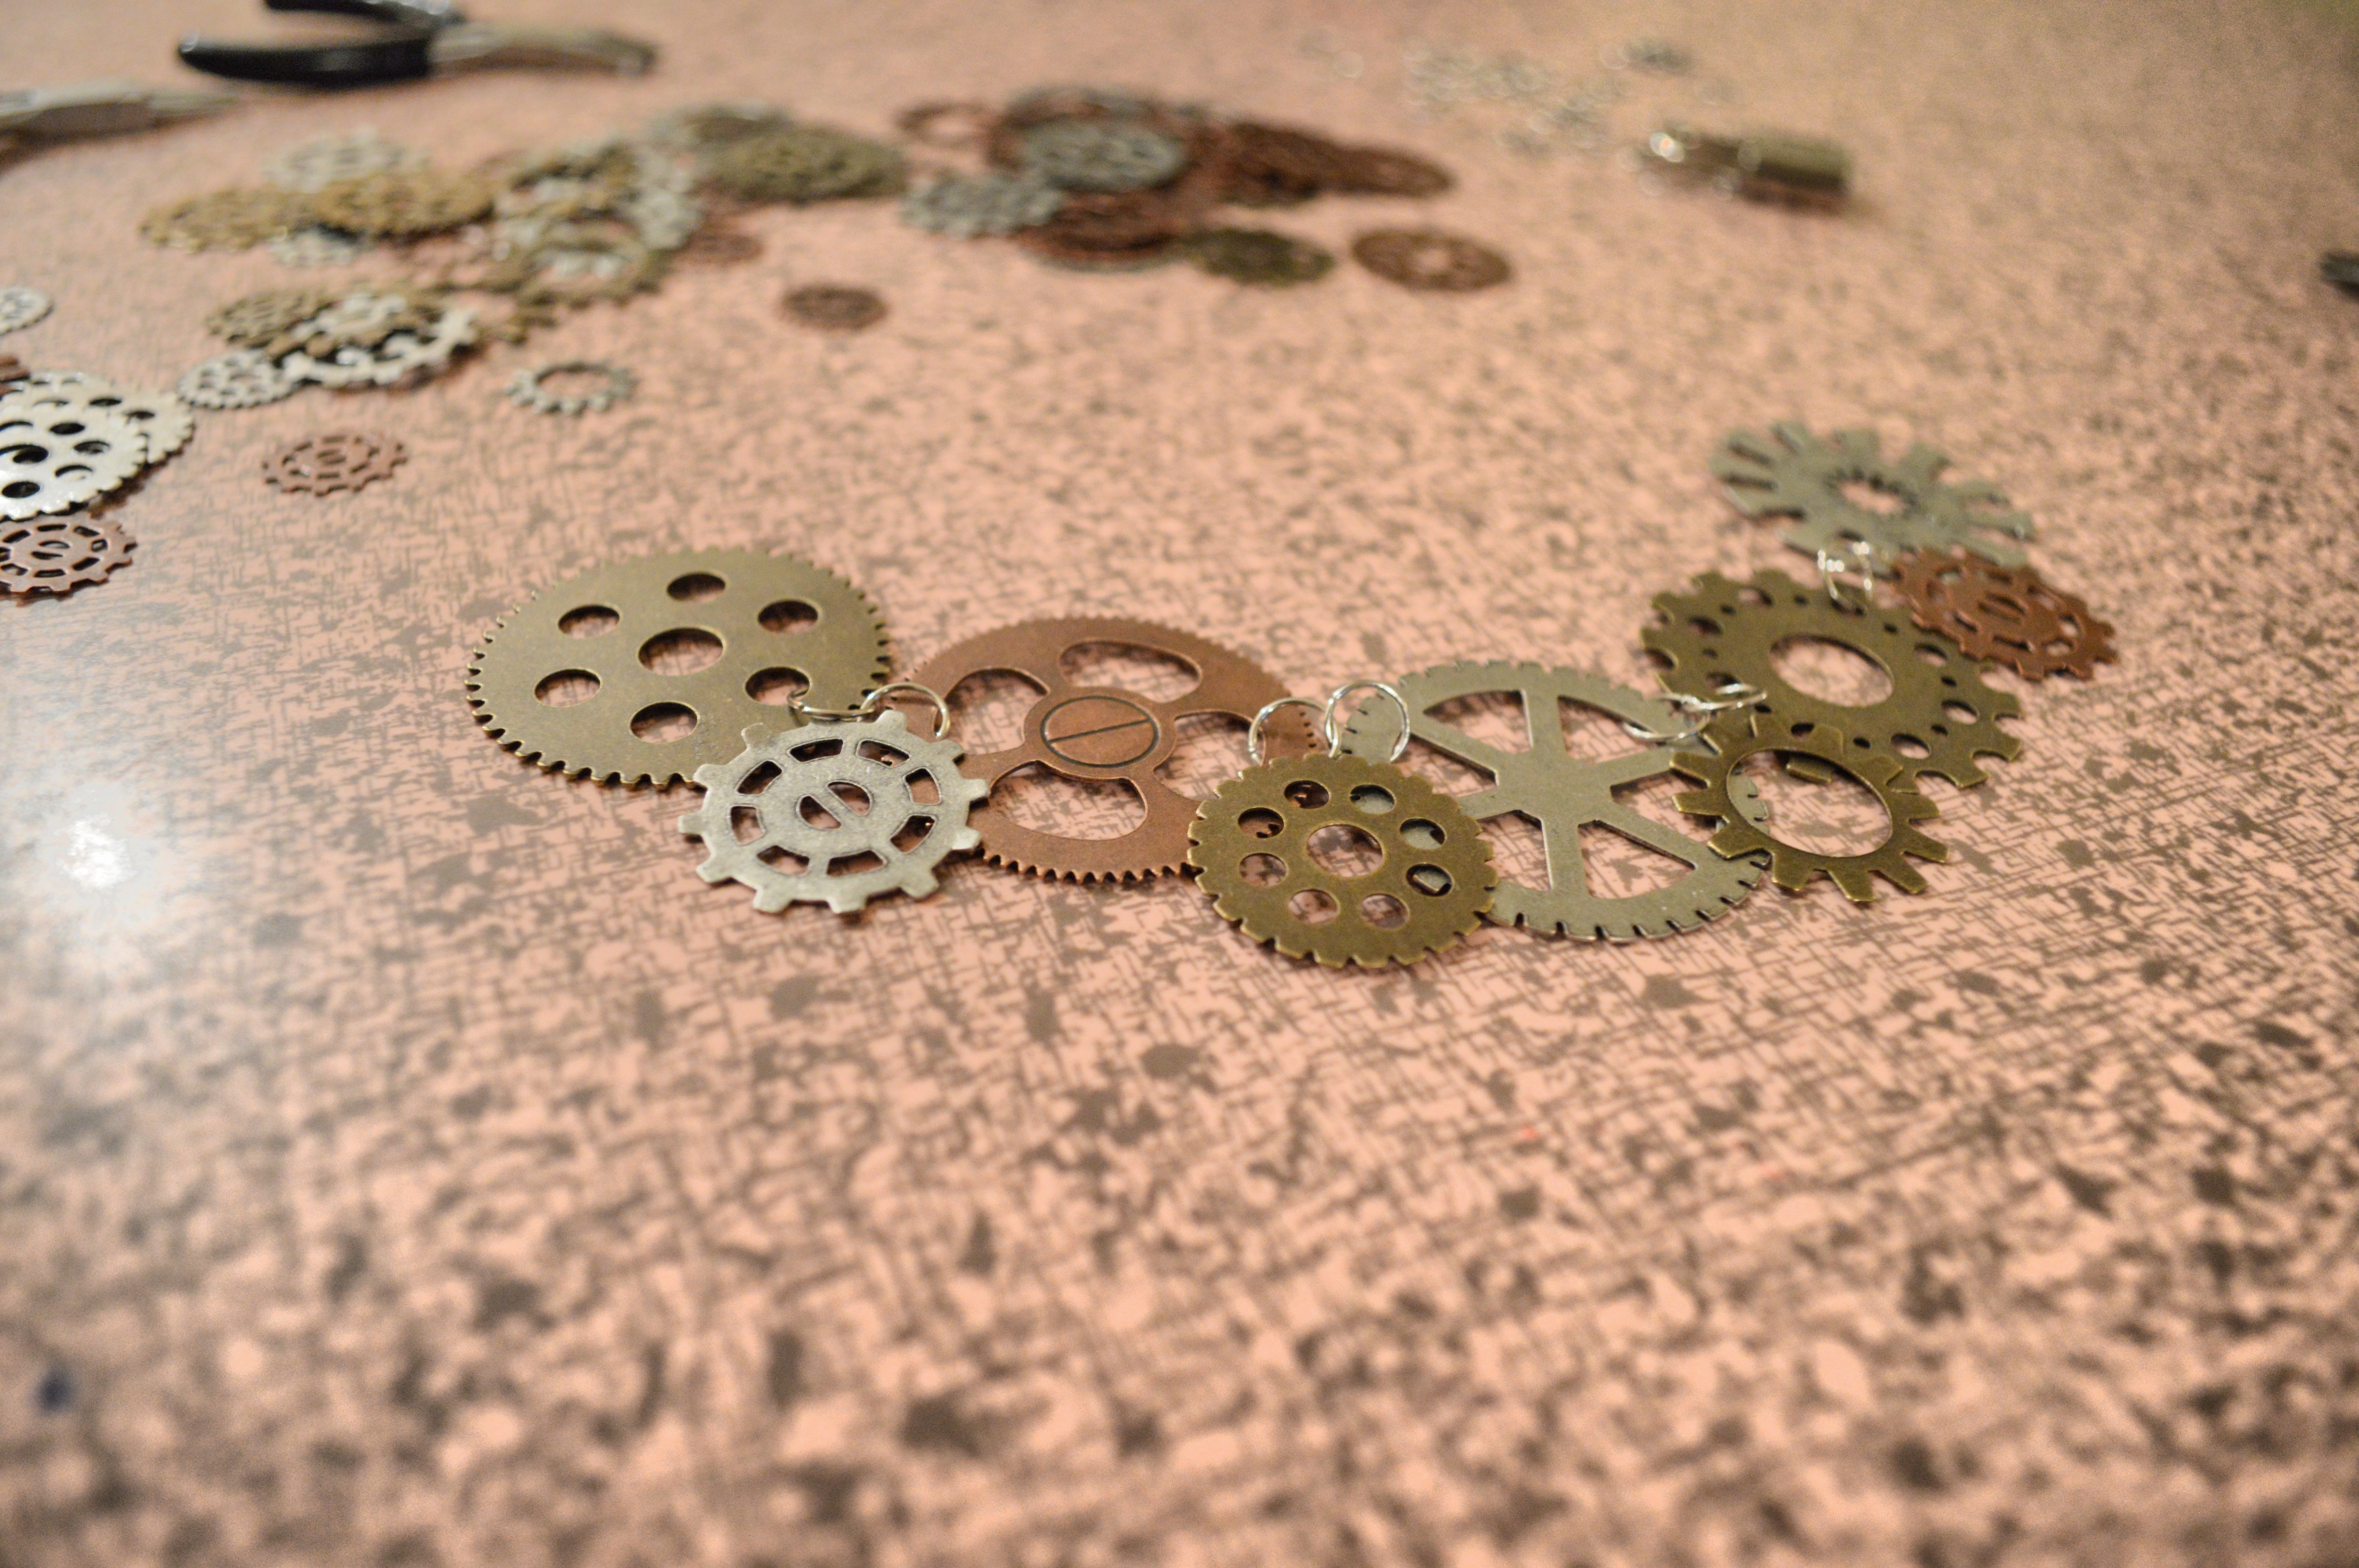
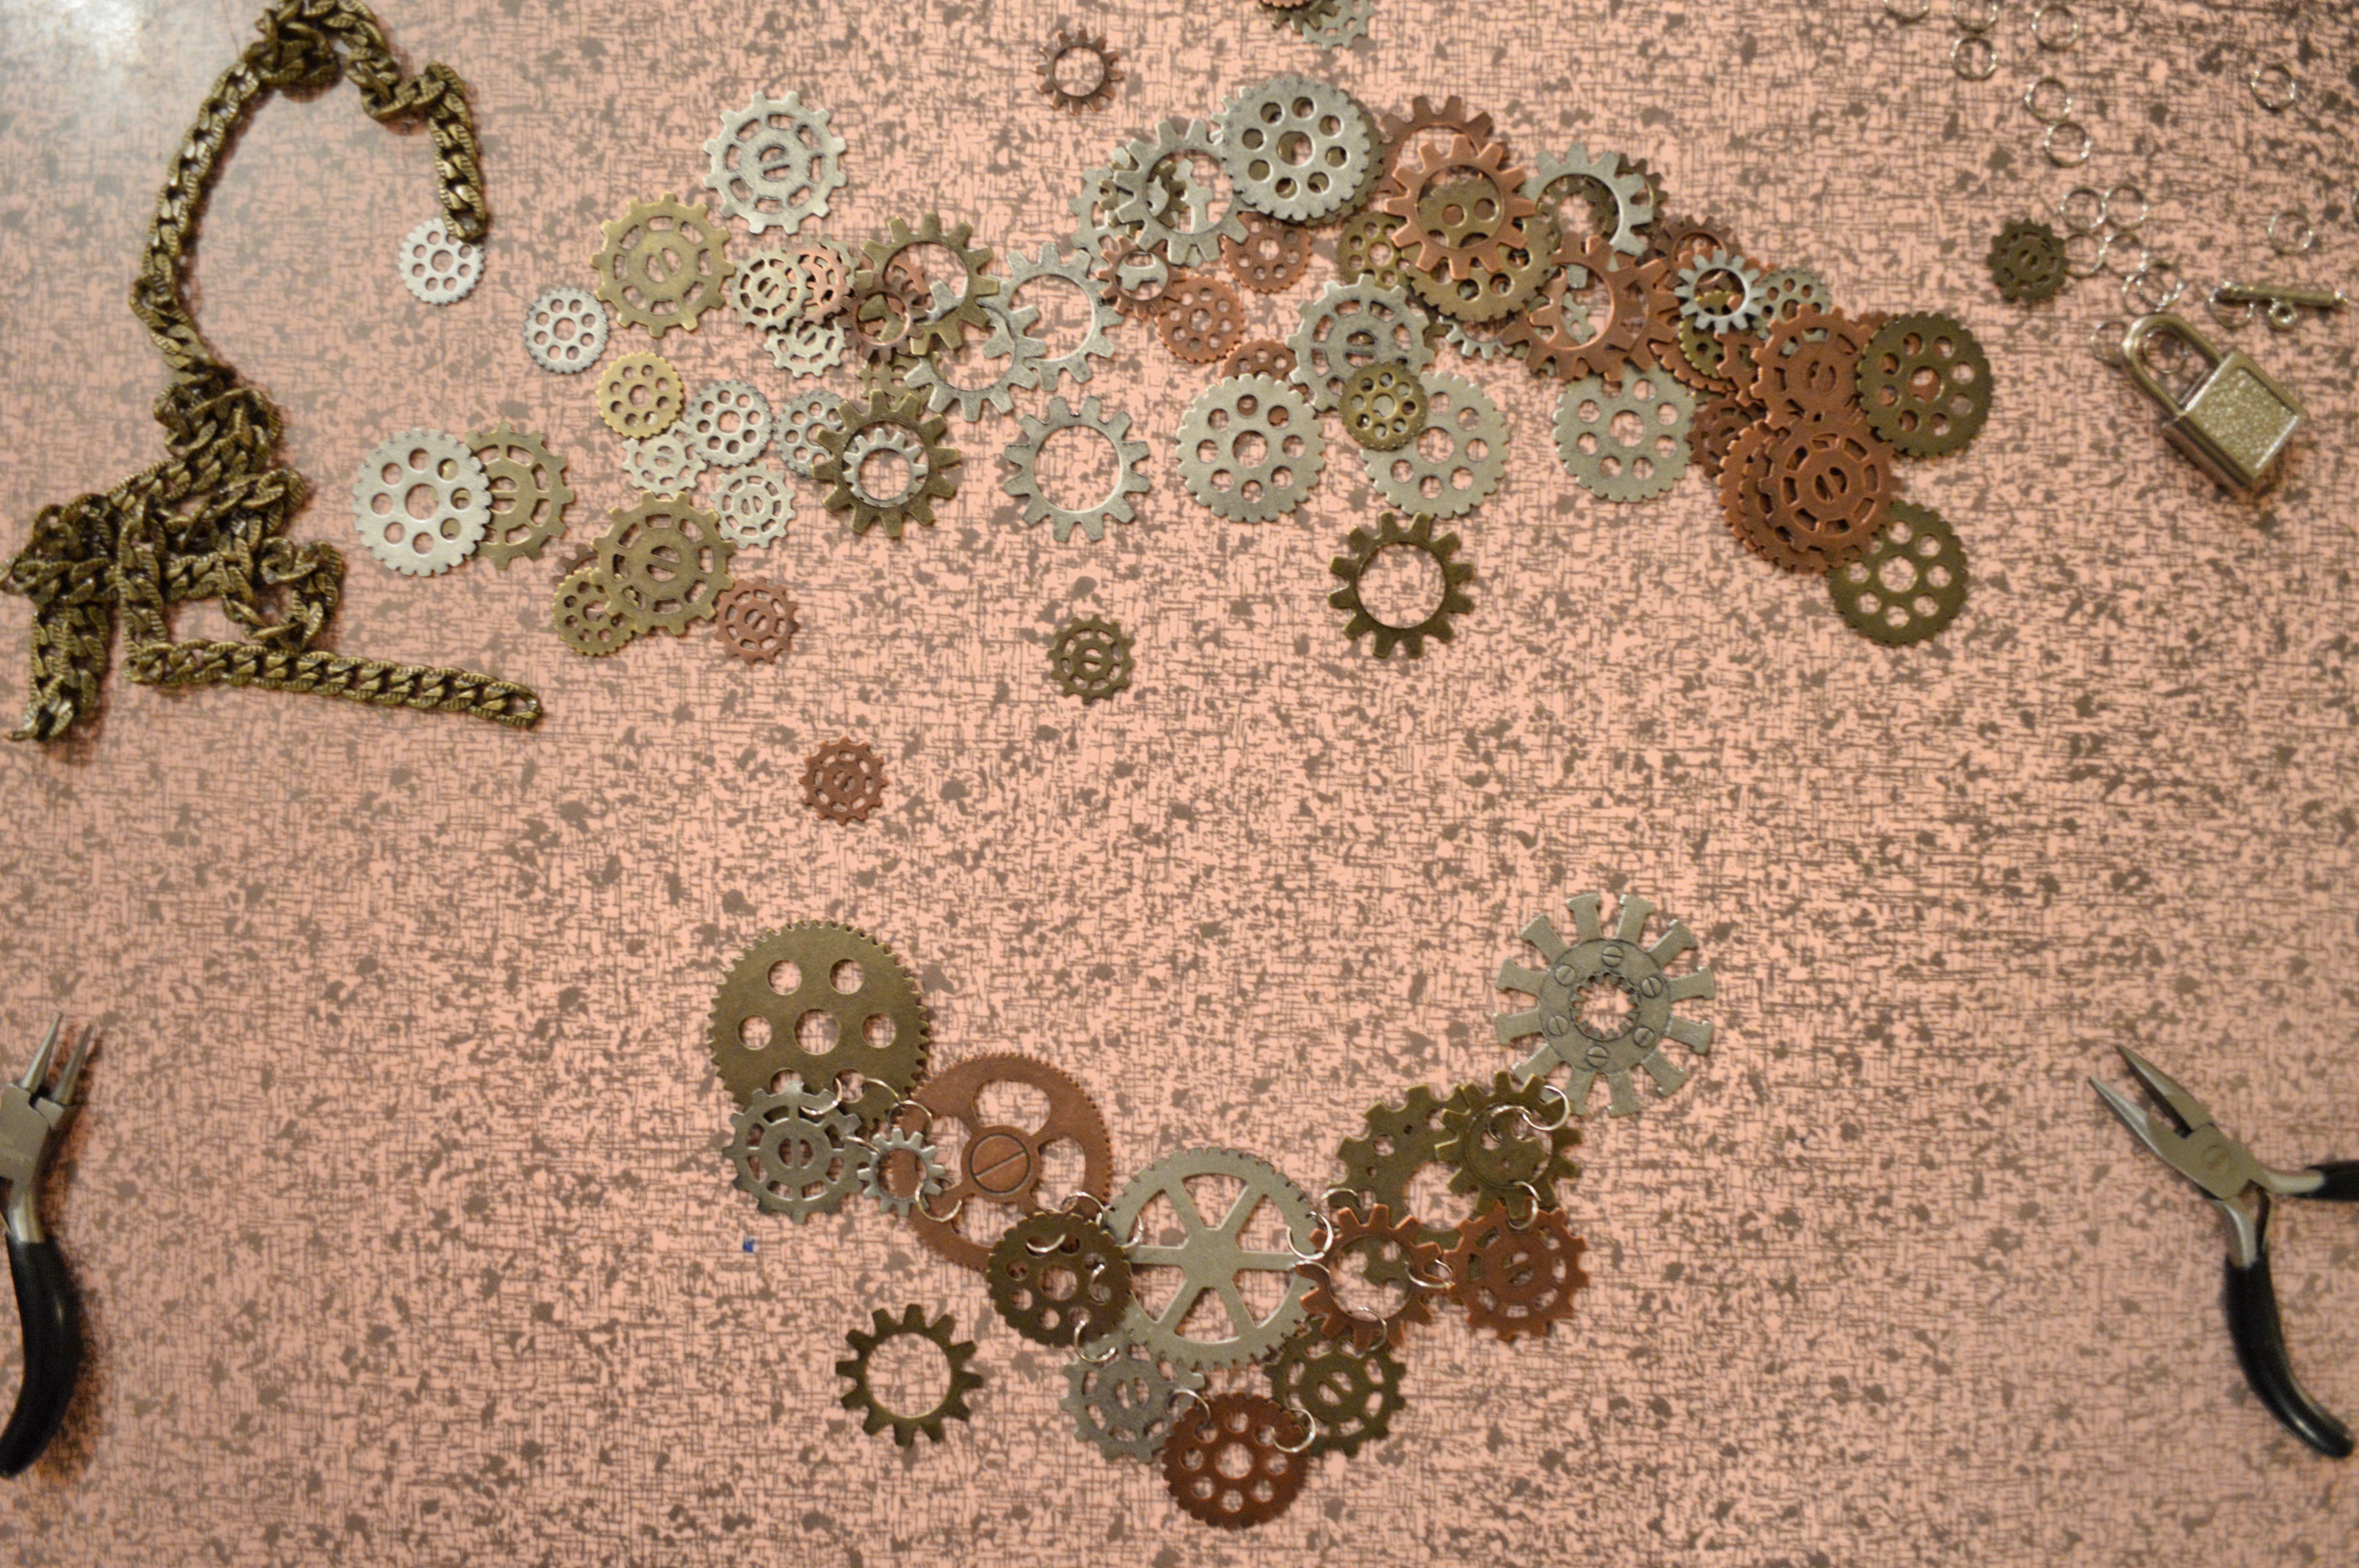
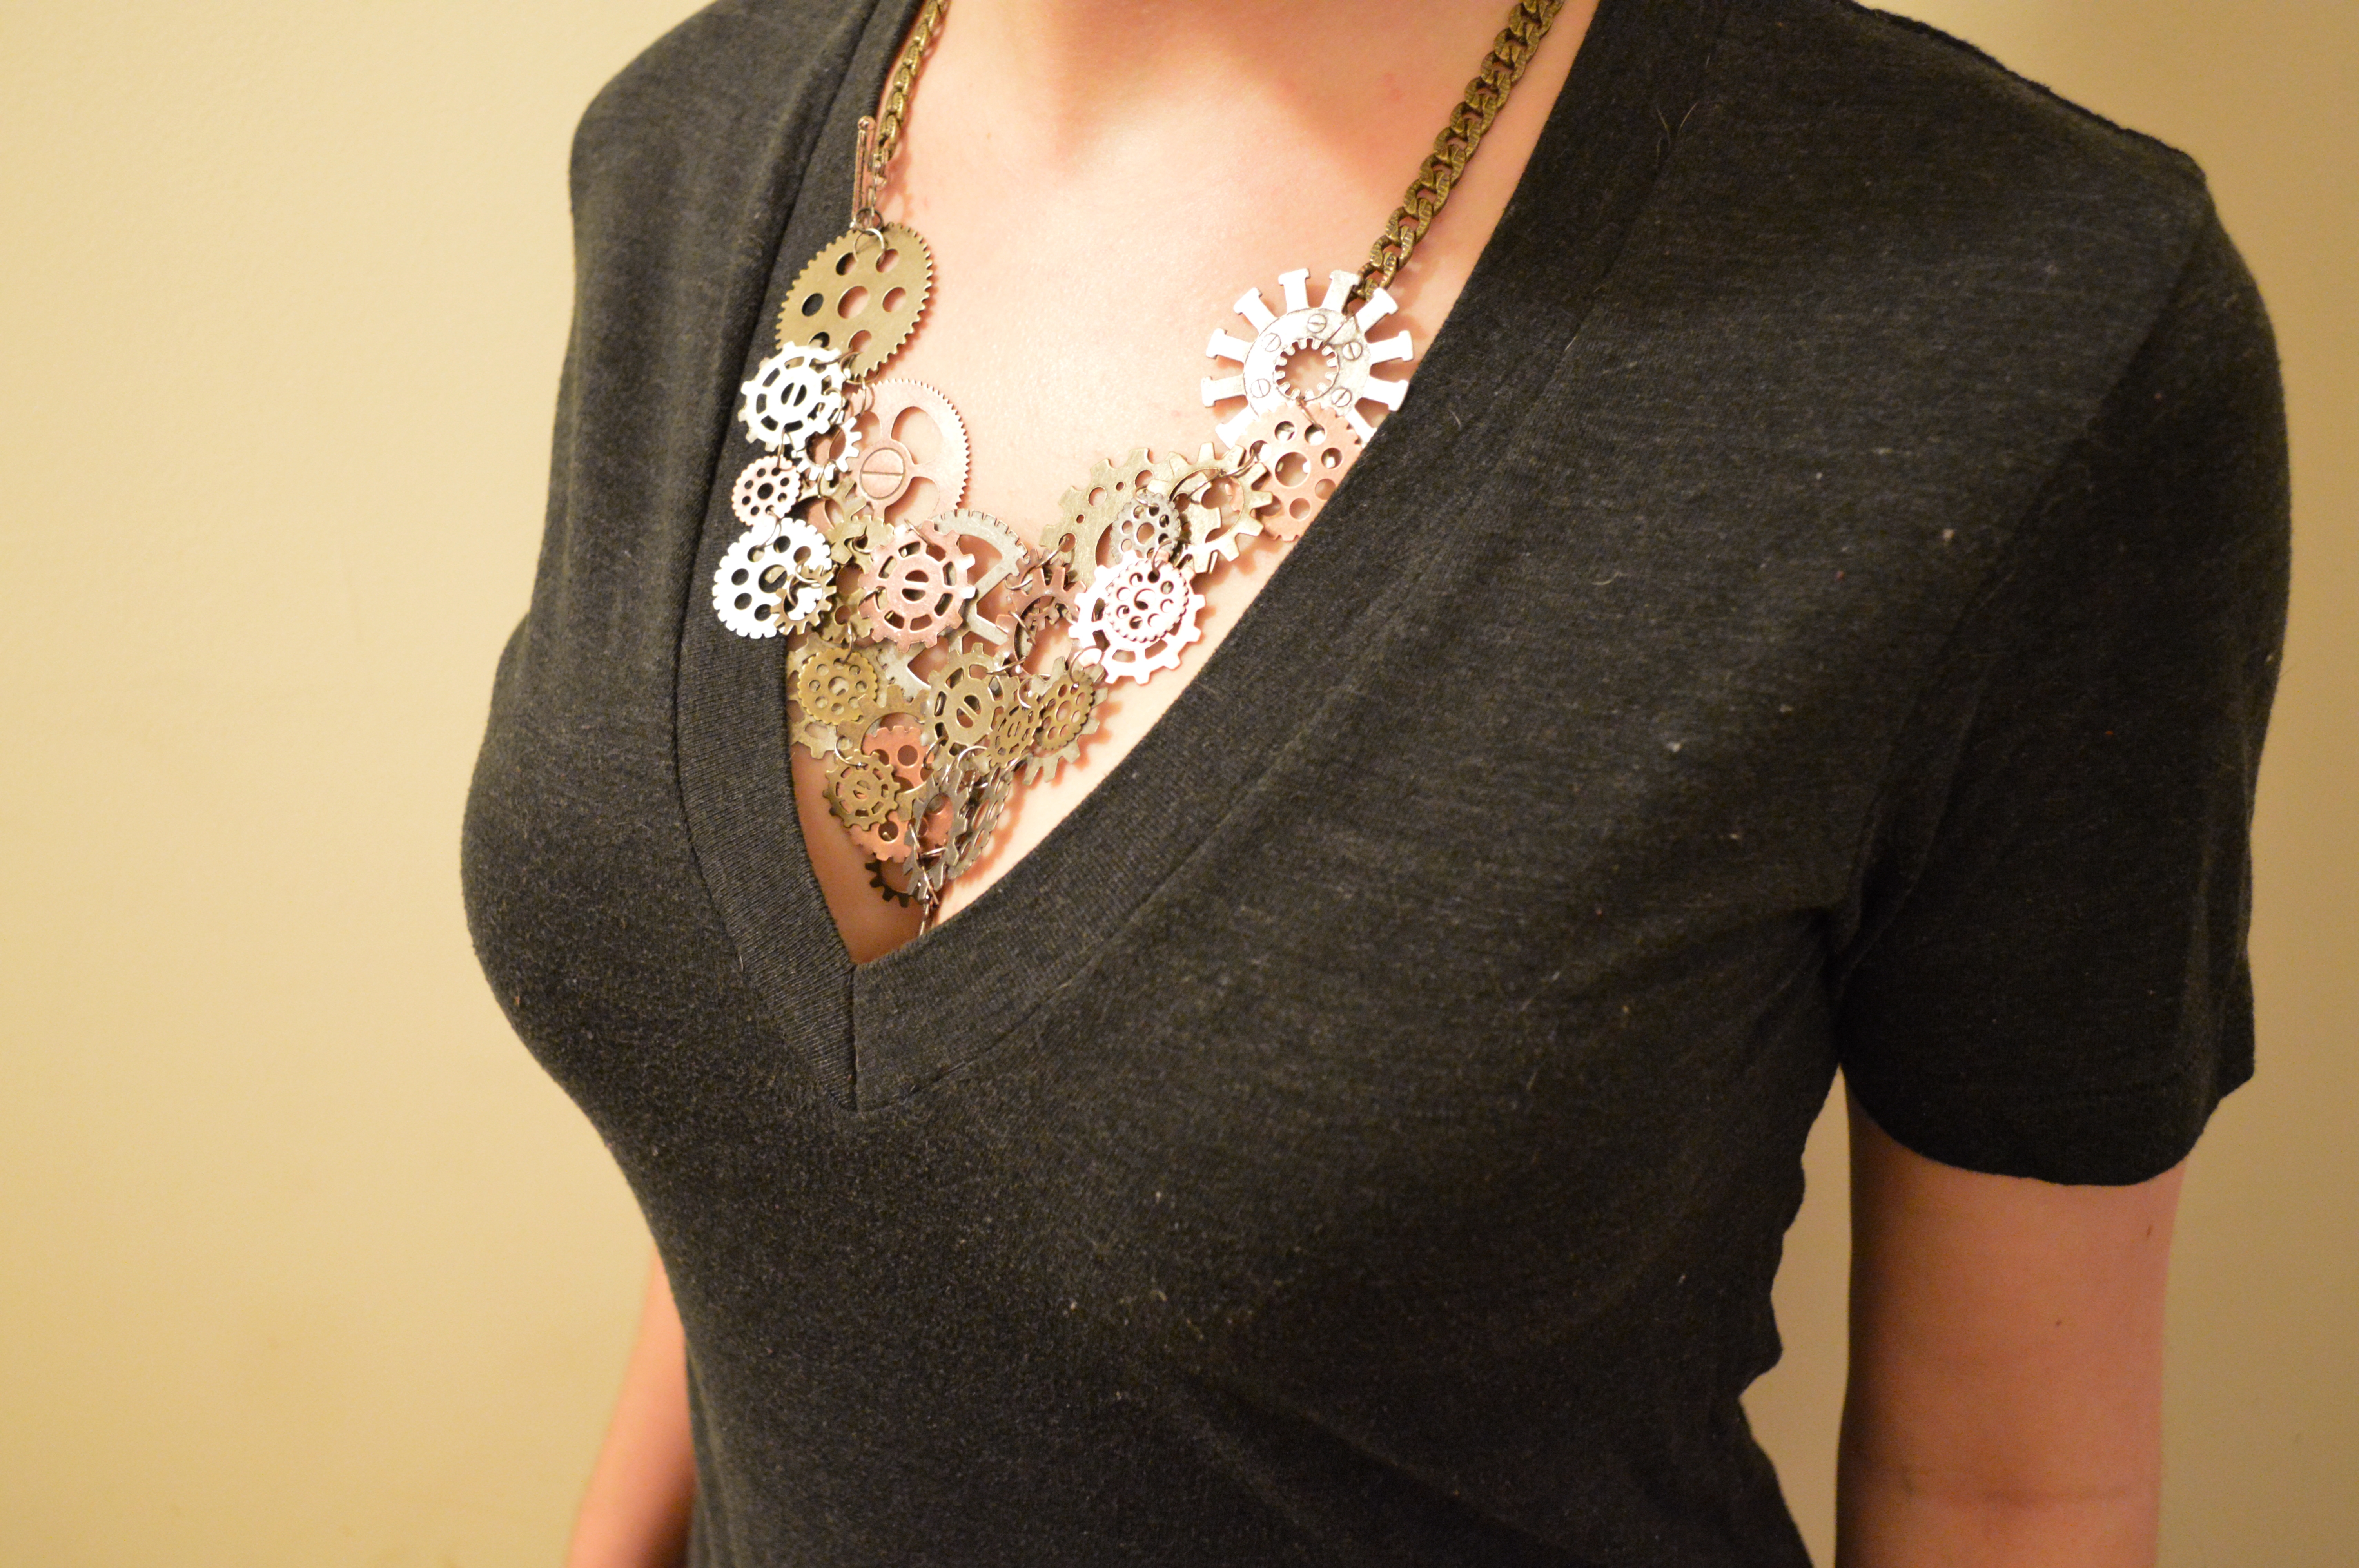
Start by placing the large gears in the shape of your necklace. Decide your order and link the large gears together with jump rings. This is hard only because jump rings are kind of evil and holding them with pliers is equally obnoxious.
Next, using jump rings, add in medium gears under the large gears to create a steadier shape. Repeat using medium gears to create several additional layers above and below the large gears. Attach all gears using jump rings. Then, add in small gears above, below, and on top of the other gears. Attach using the jump rings that are already on the necklace (meaning: unhook a jump ring that’s already connecting a large and/or medium gear, slip in the small gear, and close it up. This should help fill in any empty spots.)
It’s time for the chain! Measure out the amount of chain you want, cut it, and add the toggle clasp to one side. Find a gear that’s the correct size for your toggle and attach it to the end of your necklace. Connect the non-toggled part of the chain to the other side of the necklace. For the chain and clasp, be sure to use split rings.
Try on the necklace, fill in any blank spots with small or medium gears, and enjoy!
When I wear this necklace, I feel like I’m in the clock scene from The Great Mouse Detective. Or the clock scene from every other movie that involved fighting inside of a clock tower. Or part of Hickory Dickory Dock. Or like someone who wears a pocket watch. All good things. DIY for the win.

Very cool, Jooolz! Great statement necklace, and steampunk to boot.
LOVE IT!
Well, I had this very idea but not gotten around to it yet…and here it is! It looks great 🙂 love steampunk… thanks for working it out for me in advance, now I HAVE to try it:-)