
I was chatting about weddings with an engaged friend over the weekend and she mentioned she was going to use silk flowers. My eyes, undoubtedly, lit up. I loved using artificial flowers at our wedding and am always surprised more brides don’t do the same!
I’m not trying to undermine the beauty of fresh flowers. They’re gorgeous… and I happen to be allergic to a lot of them. To avoid migraines and hay fever, I knew we needed artificial bouquets and centerpieces. The other major benefits, in my opinion, are budget and timing. When you’re using silk flowers, you don’t have to worry about breaking the bank with a professional florist or letting DIY arrangements wilt before the big day.
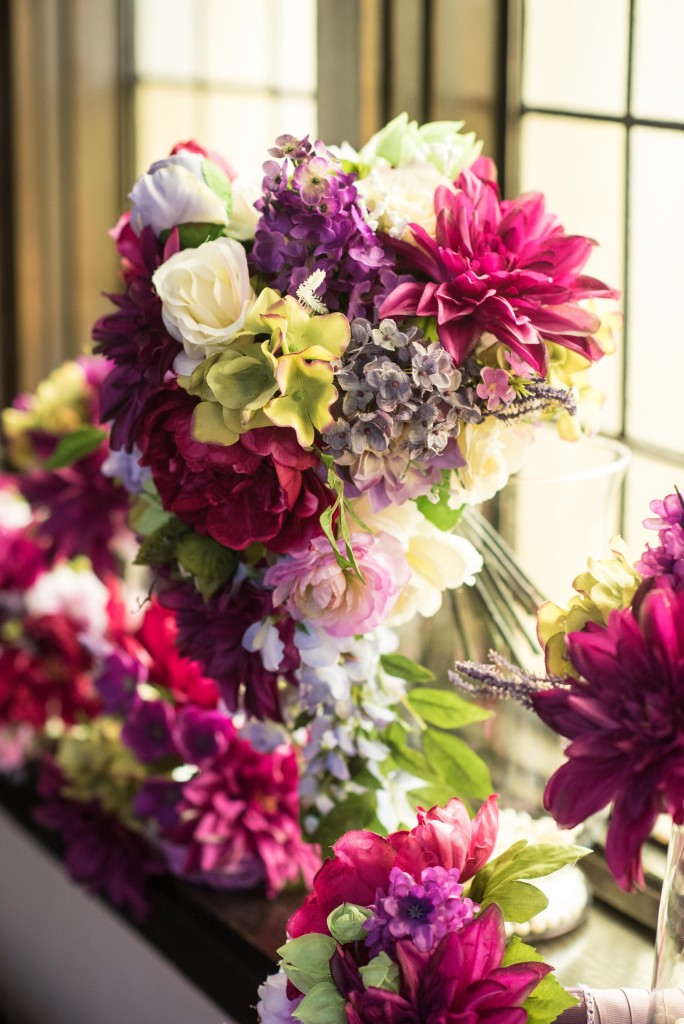
All in all, we spent about $300 on silk flowers to cover my bouquet, five bridesmaid bouquets, one toss bouquet, and 30 floral balls to use as centerpieces and reception decor. They came from a plethora of places, including AtHome, Michaels, thrift stores, and yard sales. I kept the nicest (which, as I’m sure you’d guess, were the most expensive and realistic) stems for my bouquets; because of that, about half of the flower budget went to bouquets.
I don’t mean to brag, but I’m incredibly proud of the results from my first time crafting silk arrangements. Sure, I spent a lot of time perfecting the designs, but once I had one perfect bridesmaid bouquet the entire process was pretty quick. Apparently it was well liked by guests, too! By the time people started asking about the flowers on Instagram one wedding guest bought my entire lot to use at her own wedding!

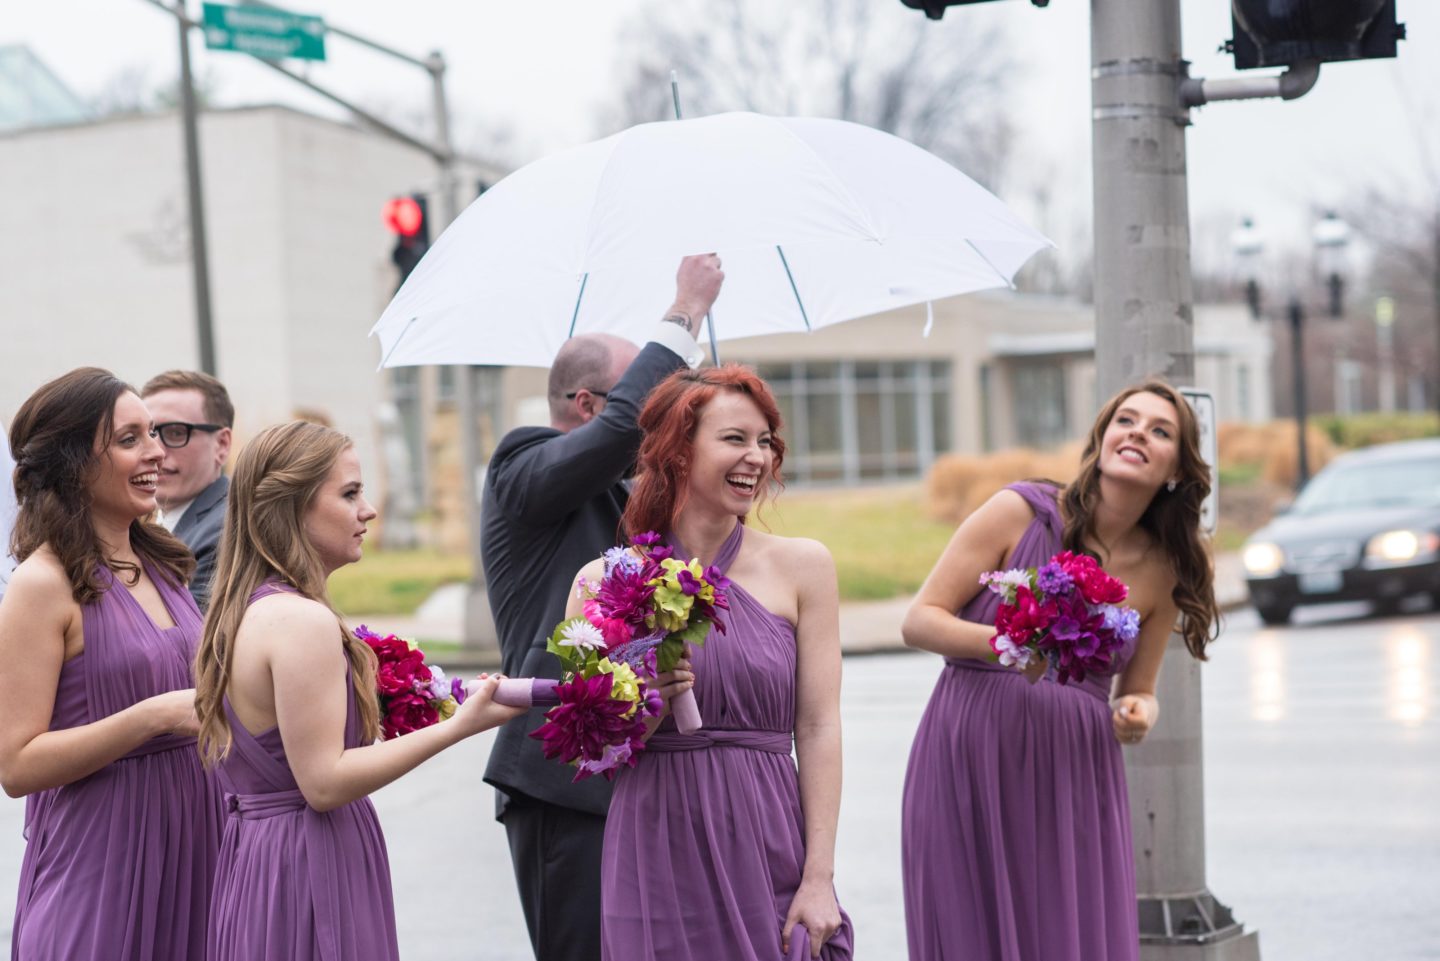
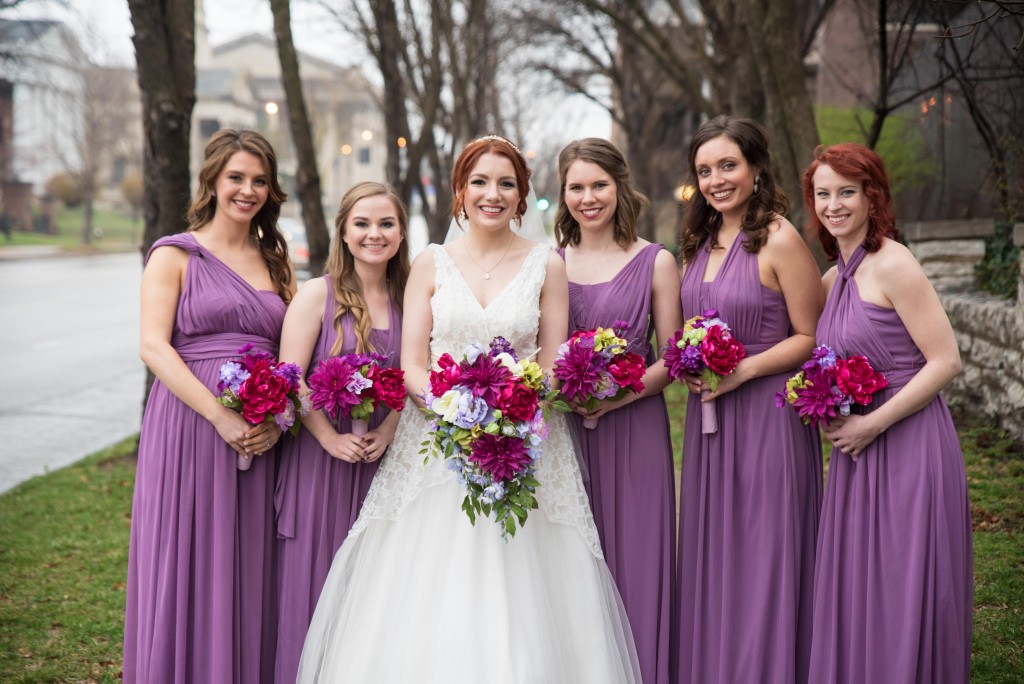
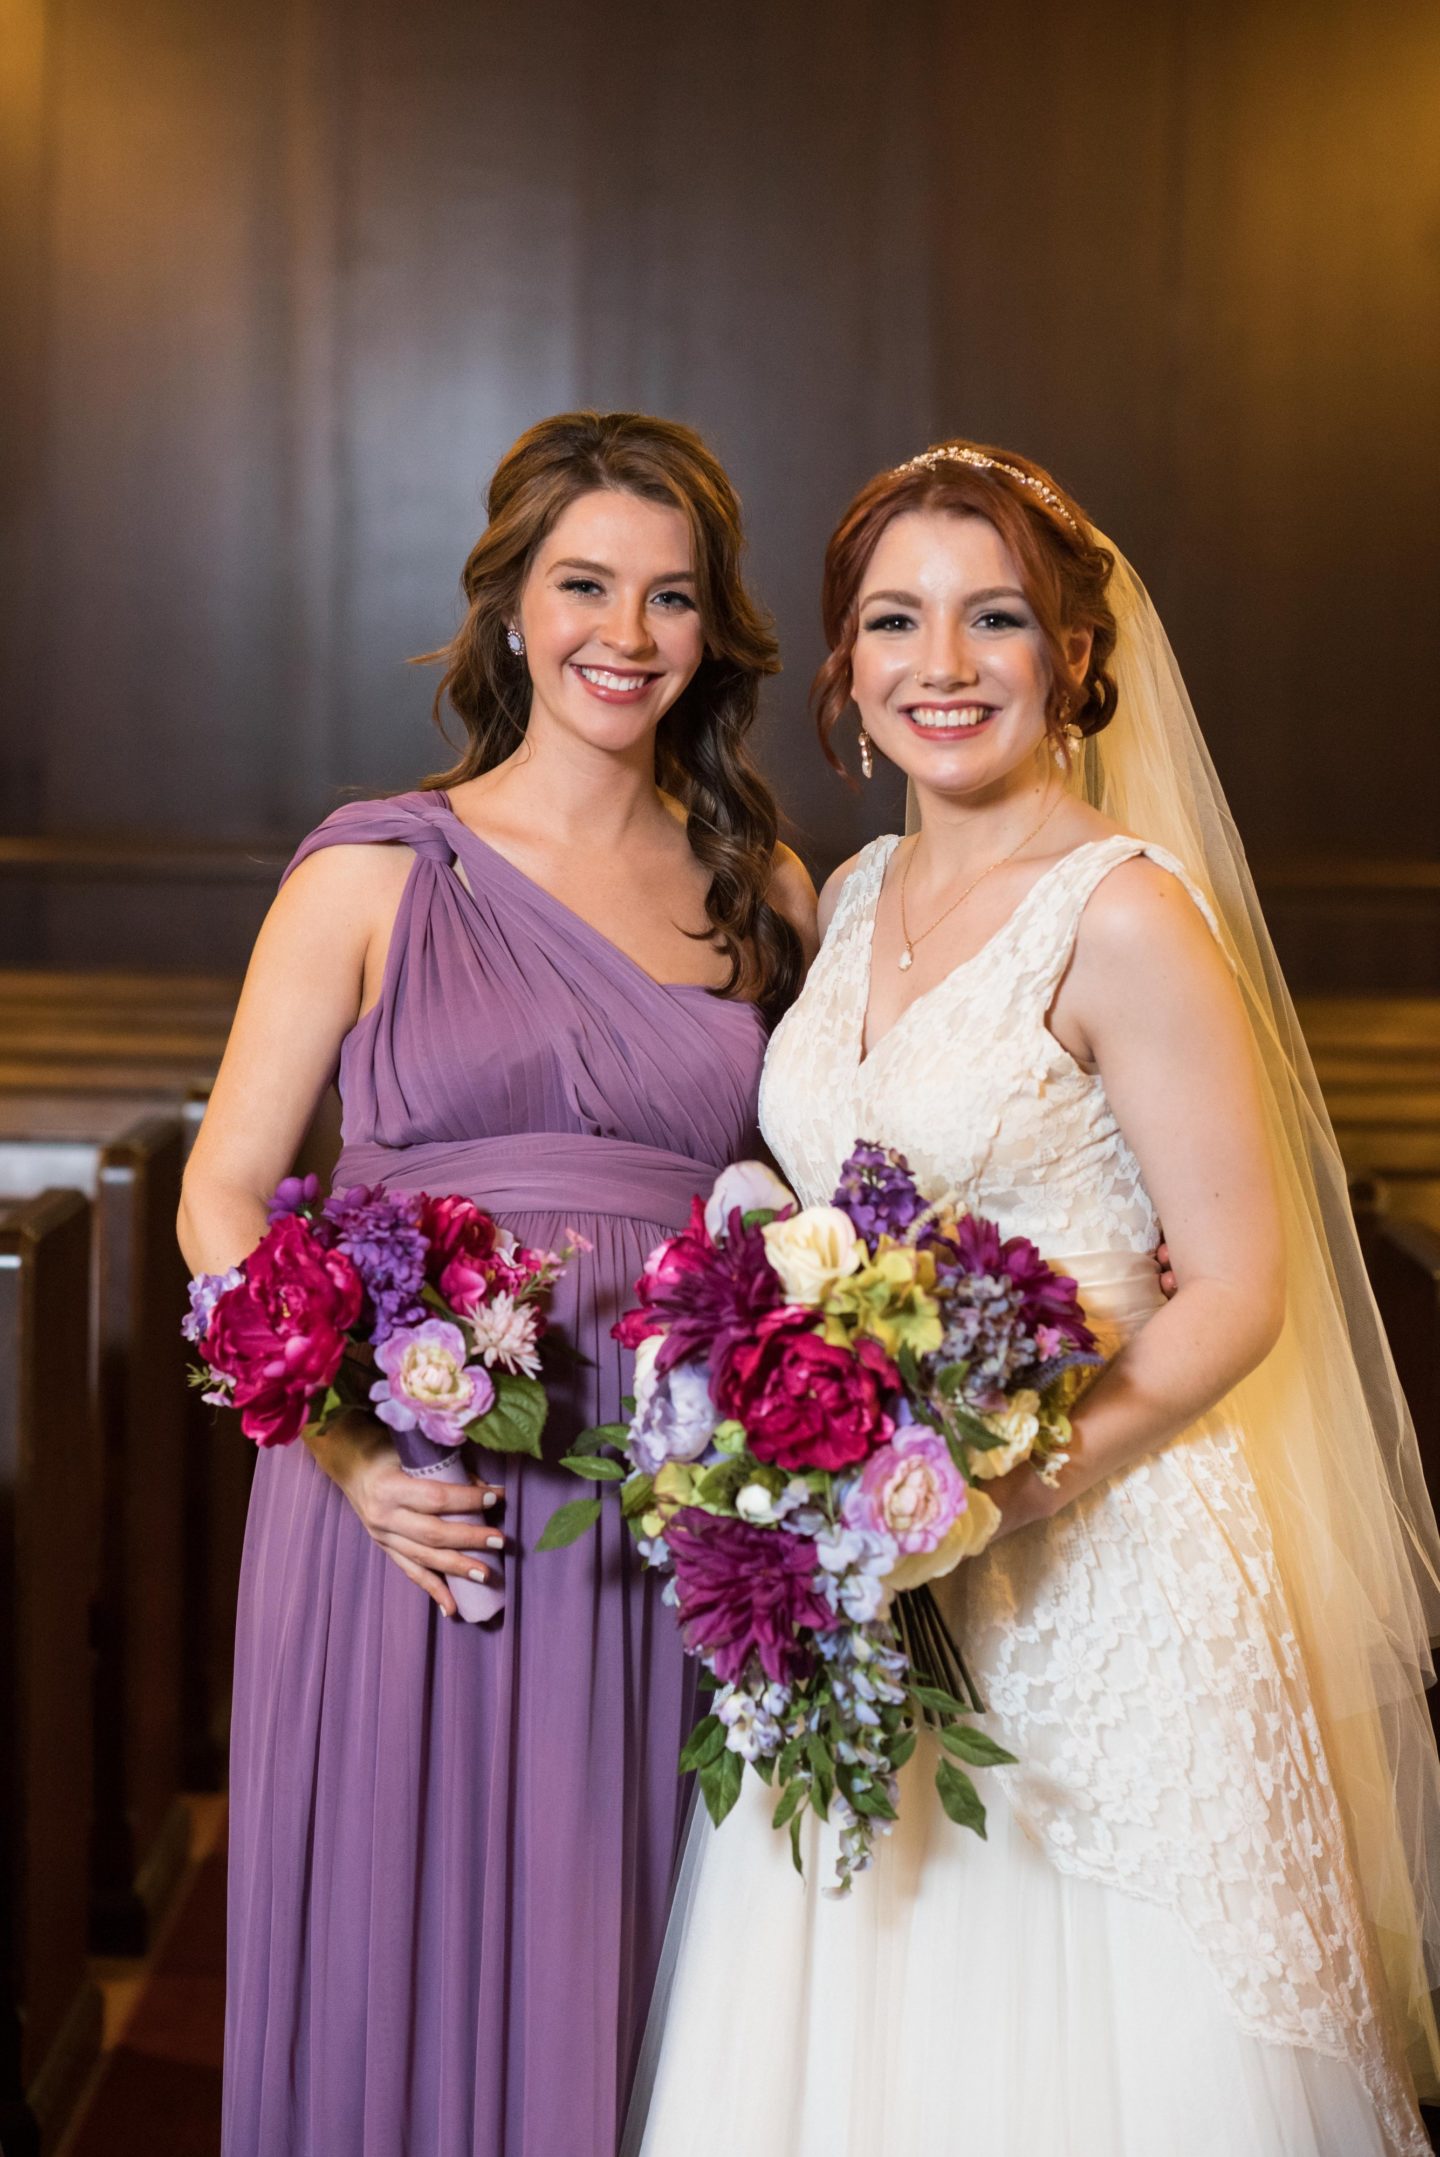

Can we take a moment to admire how one of my bridesmaids, Maggie (who is glowing in her third trimester in that photo!), so perfectly holds her bouquet? Ha! She was my only married bridesmaid, so perhaps that’s how she knew to position her hands to photogenically. Thanks to her, you can see the dark purple stripe and rhinestone detailing on the handle of the bouquet.
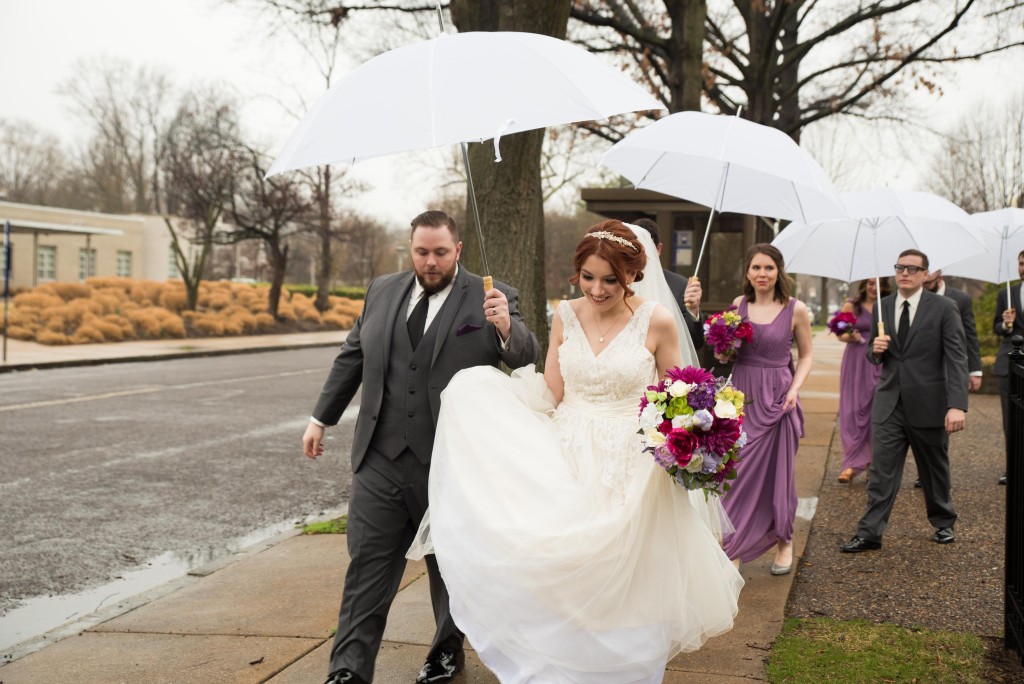
If you’re engaged and looking to cut costs for your wedding—which I highly suggest, as the closest things I have to wedding regrets are spending more than I needed to for certain smaller details no one noticed—try making your own bridal and bridesmaid bouquets. I designed mine in a cascade, or shower bouquet, style for a formal, classic look. (My mother also carried one of a similar shape, and since this was her and my grandmother’s wedding dress I knew I already liked how the two looked together in photos. Ha!) The following floral tutorials should make the process simple and affordable for all!
DIY Cascading Bridal Bouquet
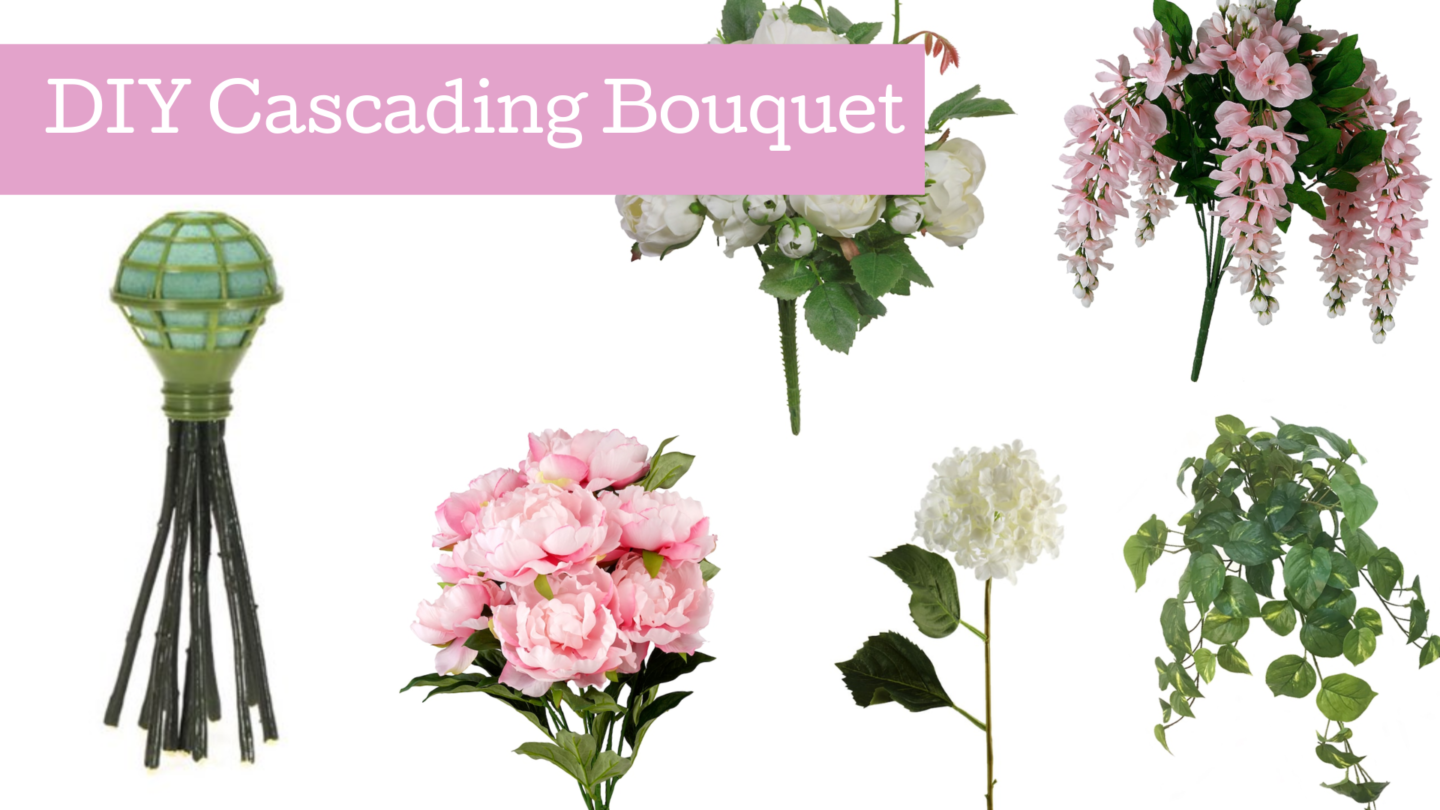
Materials
- Faux bouquet stem base
- Silk flowers in varying shapes including flexible bush (e.g. hydrangea), hanging flora (e.g. wisteria, hanging leaves), large flowers, and small flowers
- Hot glue gun
Directions
- Clip floral bushes from the bases so you have as many individual flowers with as long of stems as possible.
- Beginning in the center and with large blooms, stick flowers into the base (trimming the stems as necessary.) Remember to keep them as close to the base as possible; you’ll want the bouquet to look pretty from all angles and avoid showing the backs of blooms. Be sure to leave space at the bottom to form the cascade. It may be easiest to do this while your bouquet base is in a heavy vase, so you can see it standing up.
- Add smaller flowers next, and then fill in gaps with leaves and bushy flowers like hydrangeas.
- Once most of the bouquet is full, add a flower with longer petals toward the base to begin the transition from standard flowers to the hanging cascade.
- Tuck cascading flowers (hanging leaves, wisteria, lily of the valley, lilac, fern, silver dollar, etc.) Arrange them into a V-shape.
- Hold the bouquet up and take photos from all angles, then add filler flower and small leaves as needed to complete your desired look.
DIY Bridesmaid Bouquets
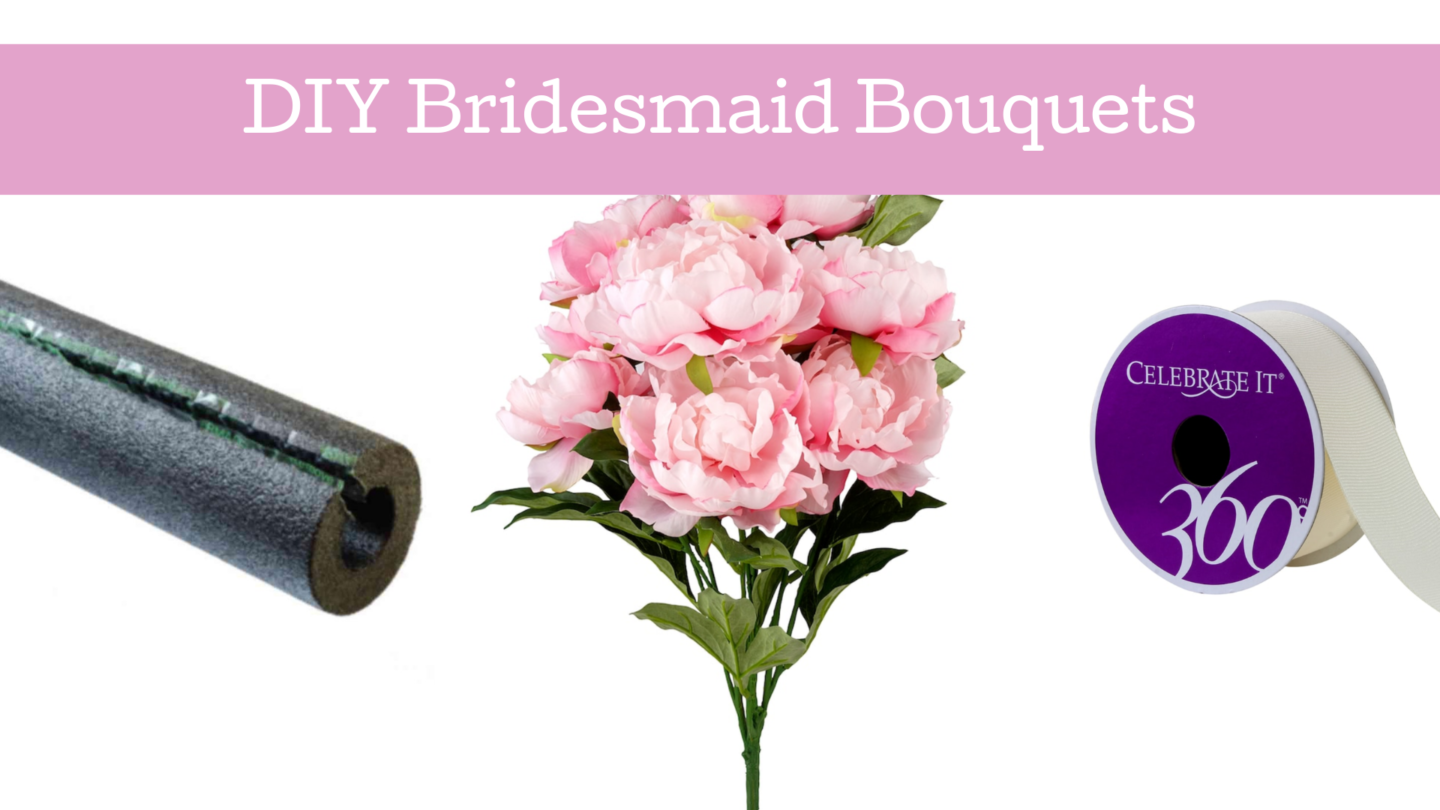
Materials
- Faux floral bouquet
- Self-sealing foam pipe insulation
- Various ribbons
- Hot glue
Directions
- Flush the bouquet for added volume and swap floral heads from a different bouquet, should you want any changes or a more impressive arrangement. Hot glue any loose blooms to the stems.
- Cut a piece of foam insulation to the length of the floral bush base. Add a few lines of glue around the base, then put on the foam and seal. Fill in gaps on either end with more hot glue.
- Once dry, cut a piece of ribbon large enough to cover the base and glue it over the bottom like a cap.
- Wrap additional ribbon(s) around the foam, gluing along the way.
Want to DIY more of your wedding? Learn how to make DIY Save The Dates for free, DIY $7 Wedding Reception Centerpieces, and DIY ‘Be My Bridesmaids’ boxes!

Beautiful
These are beautiful! I’m working on making the bouquets for my upcoming wedding. I love the base you used for the cascade bouquet with the artificial stems. Where did you find that?
Author
Thank you! I believe mine was the Wilton Fresh Look Bouquet Holder (likely from Joann’s?) but it doesn’t seem to be readily available anymore. The closest I’m seeing online right now is this one from Etsy, although it’s missing the foam ball at the top. Maybe you could contact Wilton and ask if they still sell them? Or try attaching your nicest silk flower stems around an existing base, like this or even one that’s skinnier and easier to hide in the stems?