
Going out is great, but my all-time favorite weekend activity is crafting. This chilly weekend is absolutely perfect for jewelry making, decorating, sewing, creating, and all other forms of pajama-wearing arts ‘n crafts. Need a new project? Try your hand at the easy and affordable DIY Rhinestone and Pearl Statement Necklace.

I made this rhinestone and pearl statement necklace out of desperation—I couldn’t find the perfect (affordable) necklace to wear with a dress. The project took about an hour to complete, and cost significantly less than the statement necklaces I’ve seen for sale.

You’ll Need…
5 Rhinestone metal slider beads
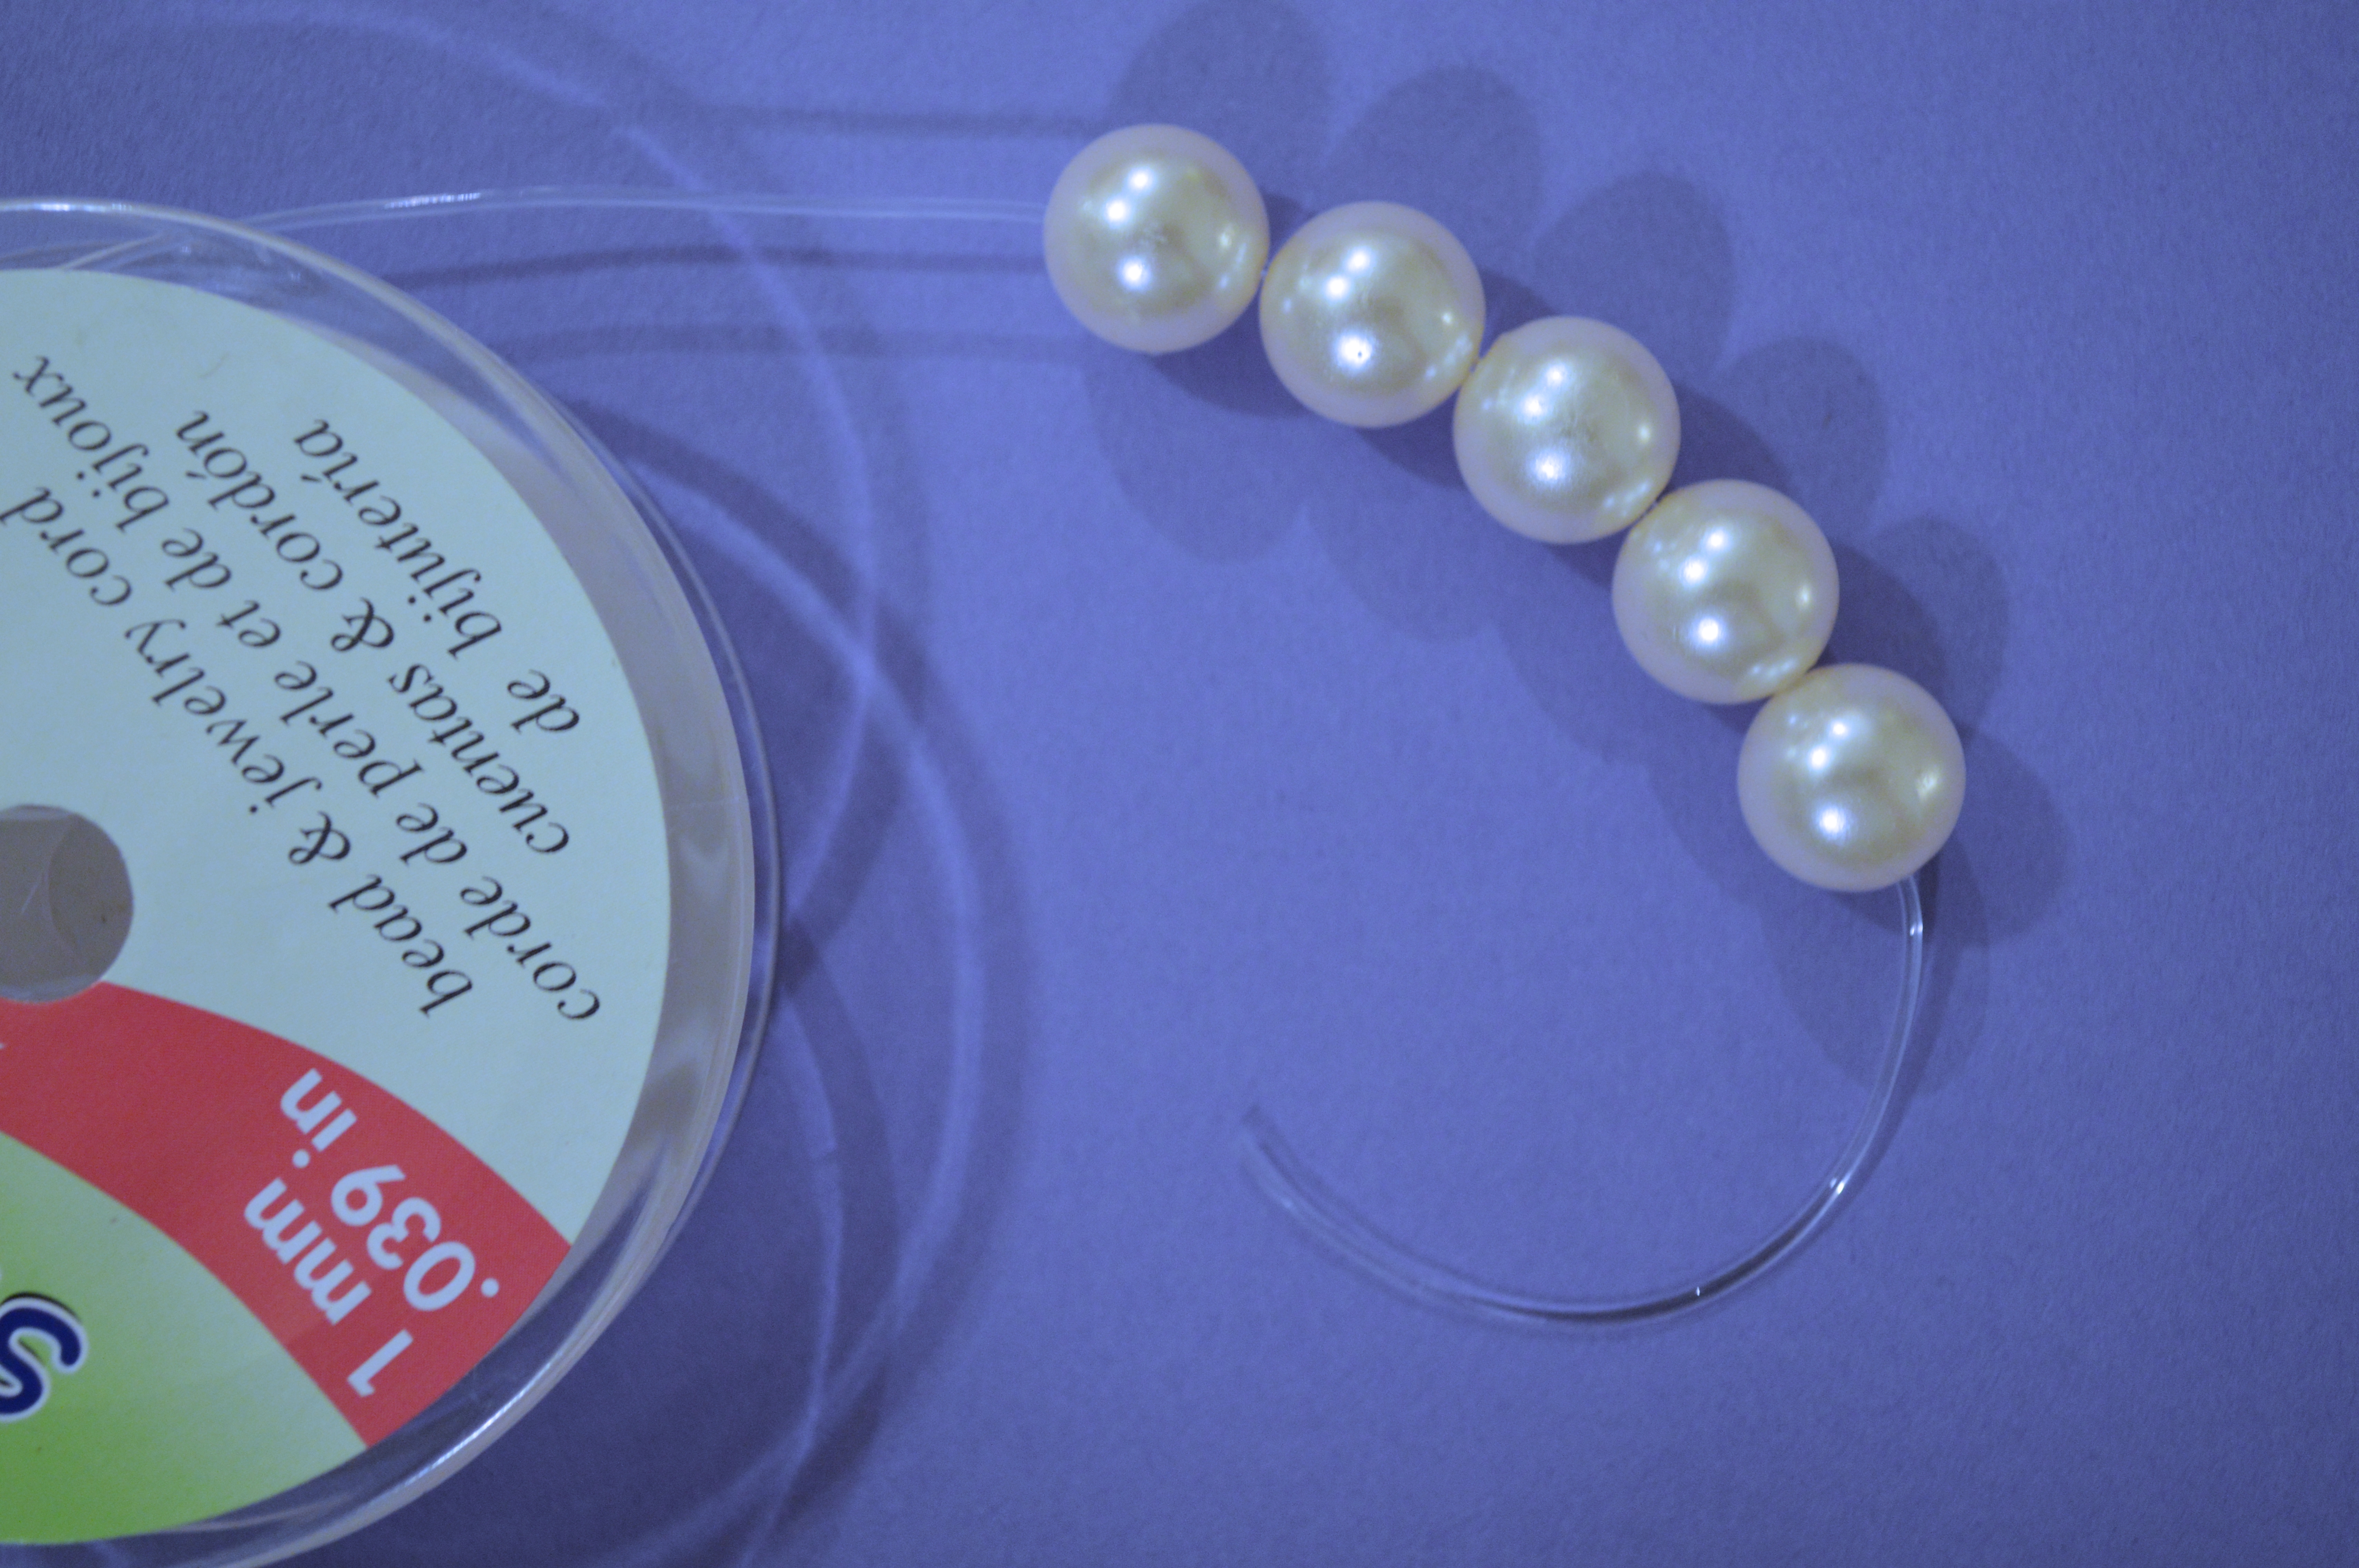
6 Plastic pearls
1 Drop pearl bead (here’s an option)
Thick chain
3 Jump rings
1 clasp
White embroidery floss
Embroidery needle
Wire cutters
Scissors
Jewelry pliers (depending on your type of jump ring)
Glue
Rubber gloves (optional, if you don’t want glue on your fingers)
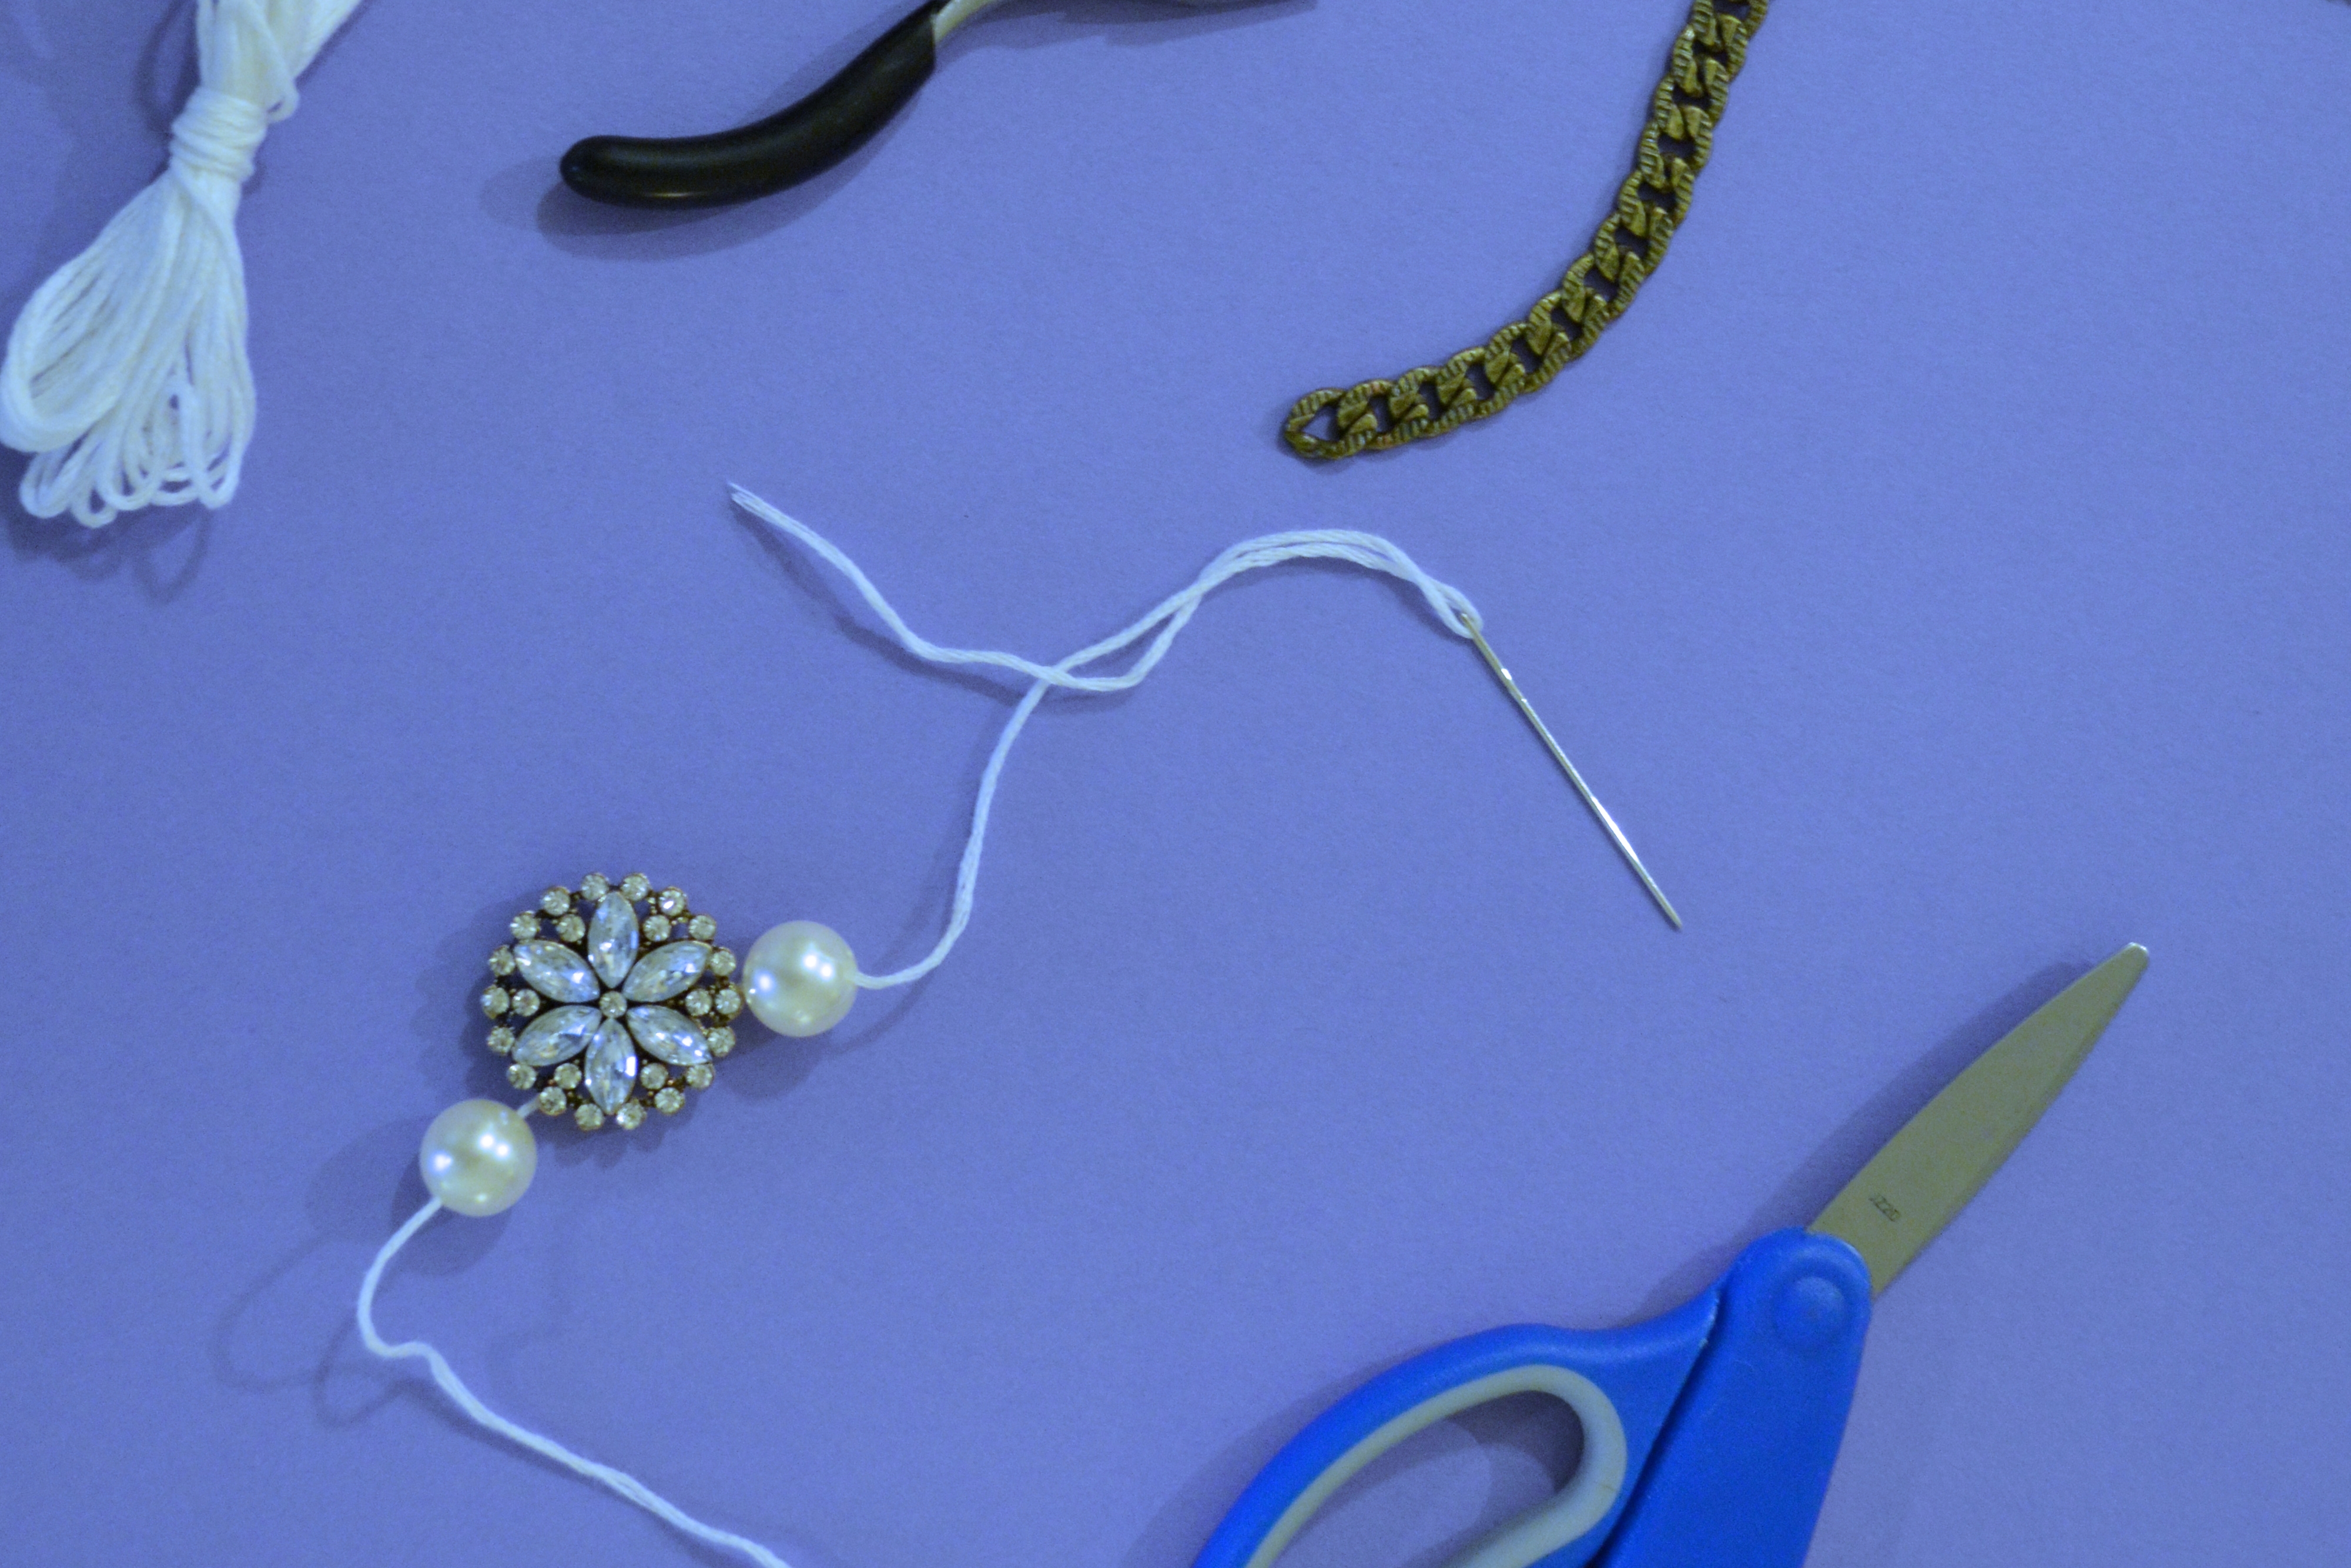
Thread your needle with the embroidery floss, and string together the beaded part of the necklace. Alternate pearls and rhinestones. Once strung, leave a few inches of extra thread on each side of the beads and cut.

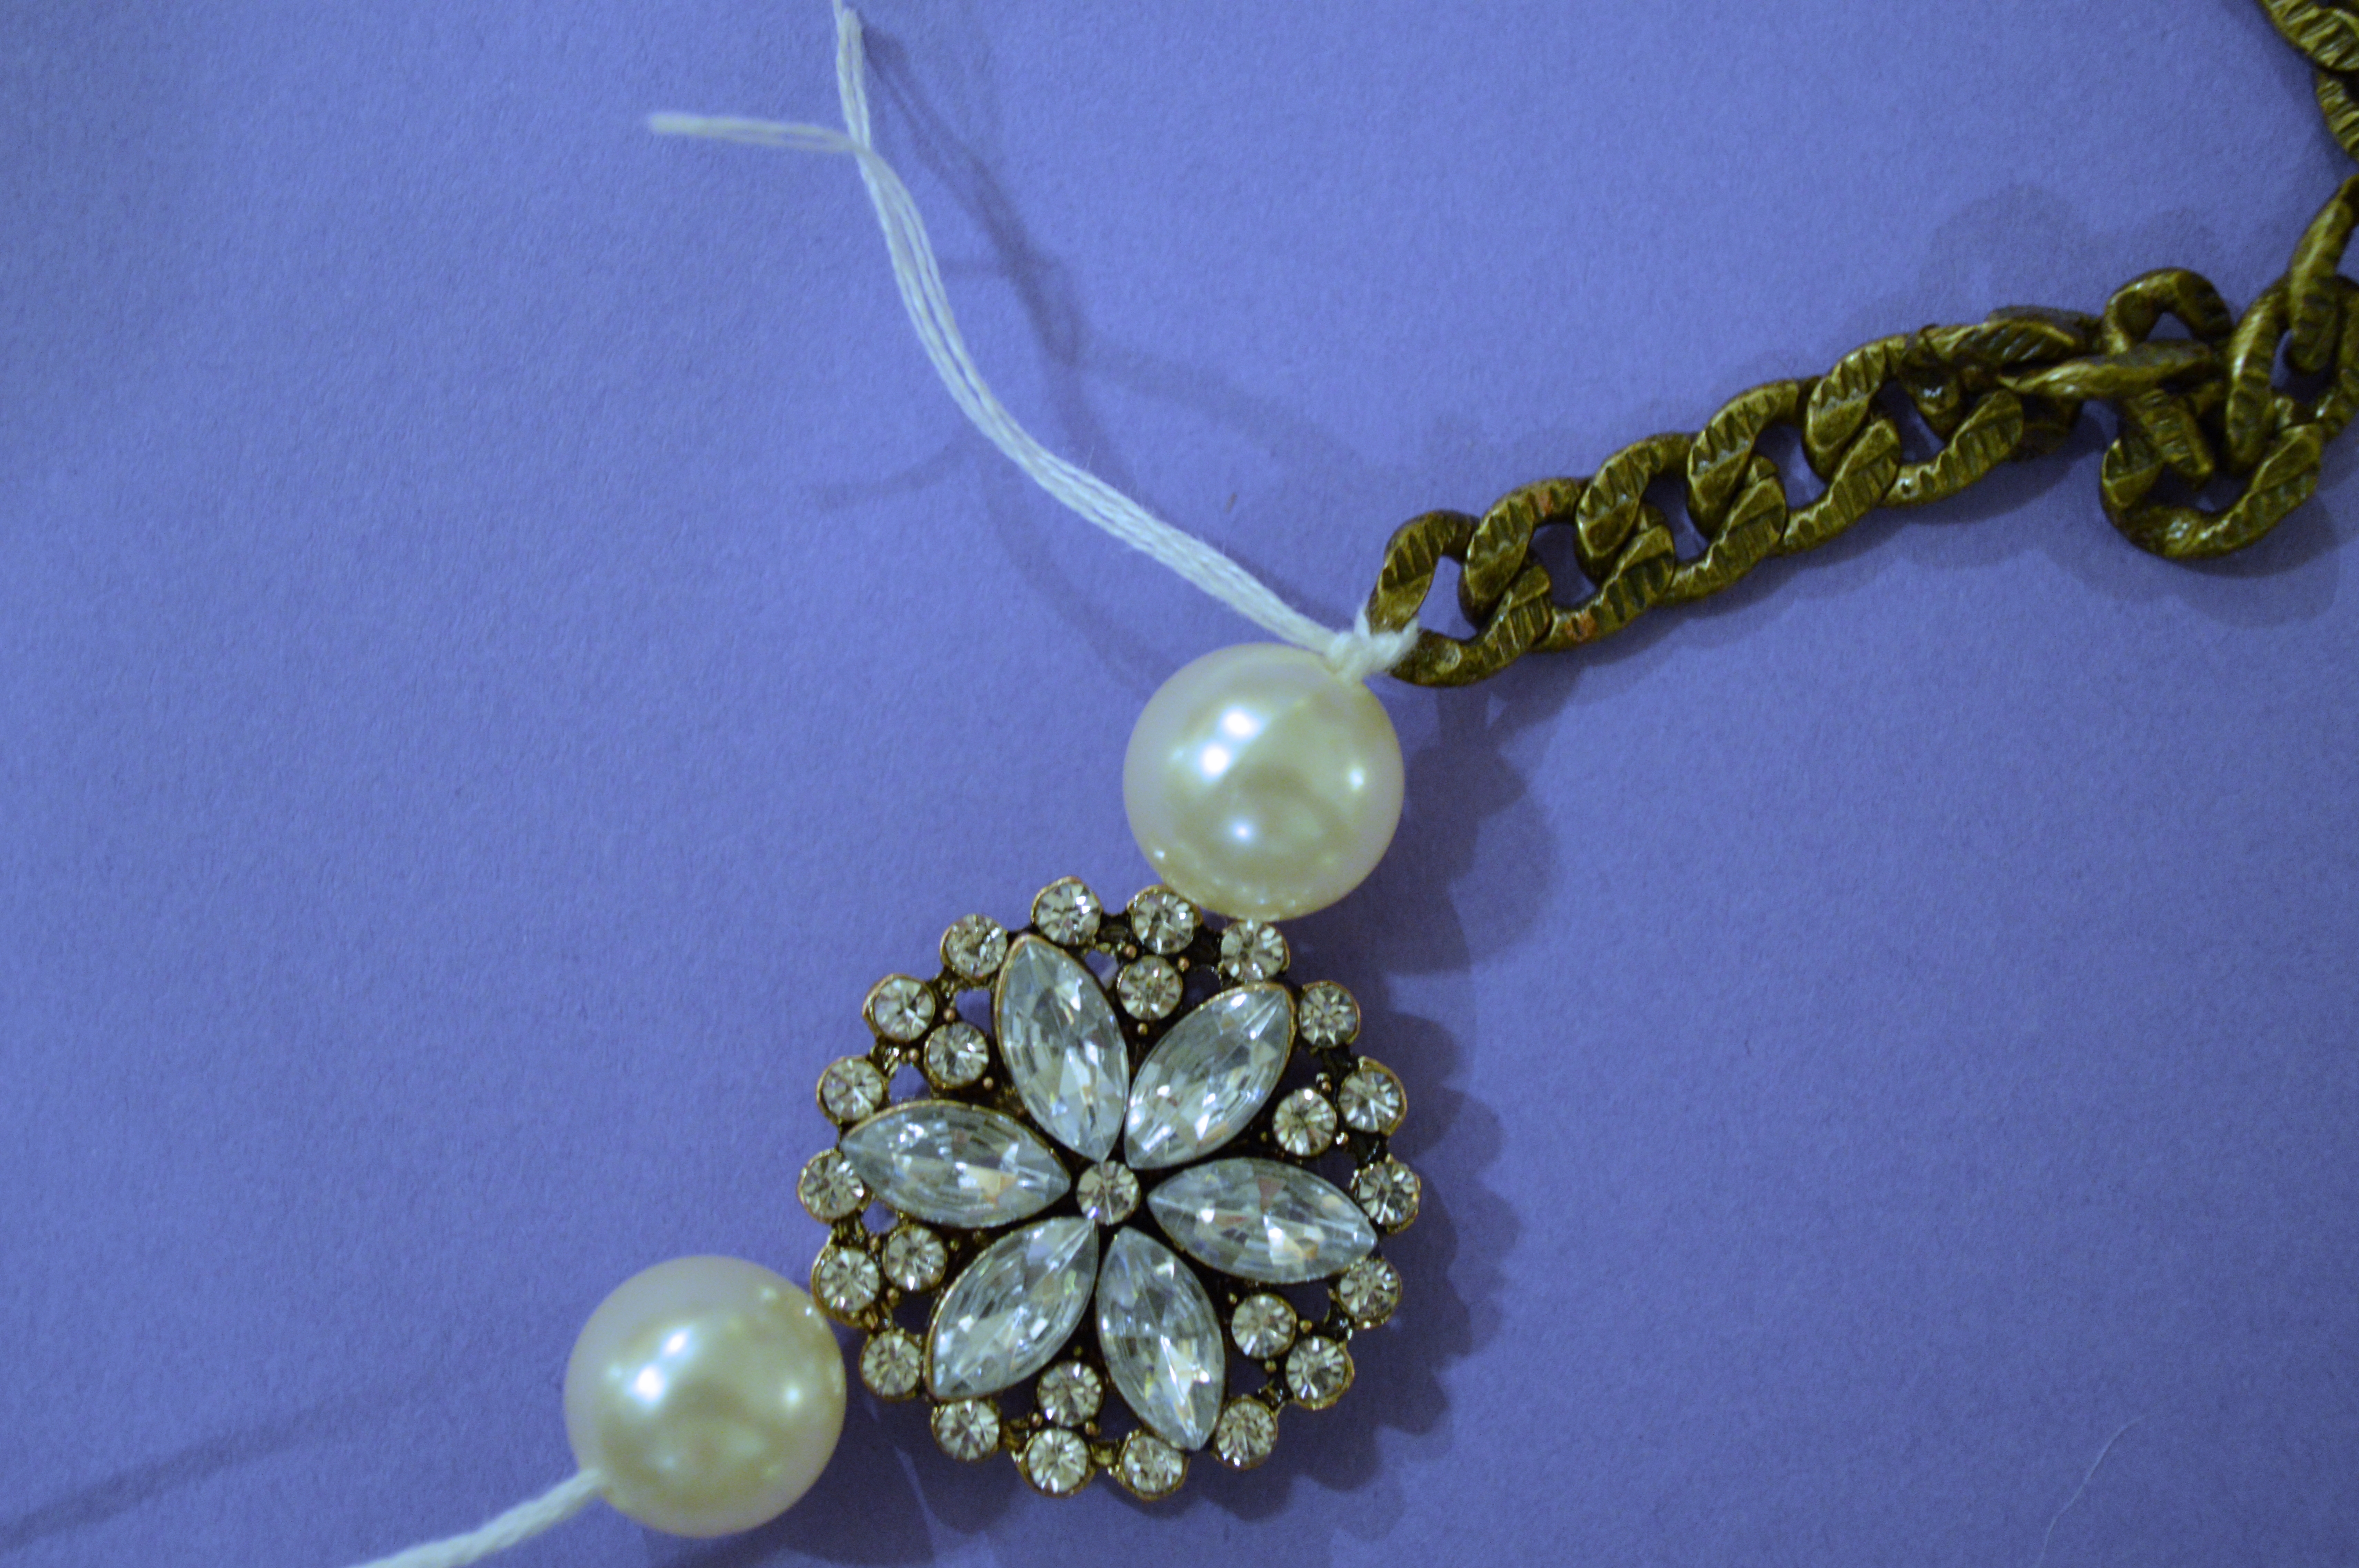
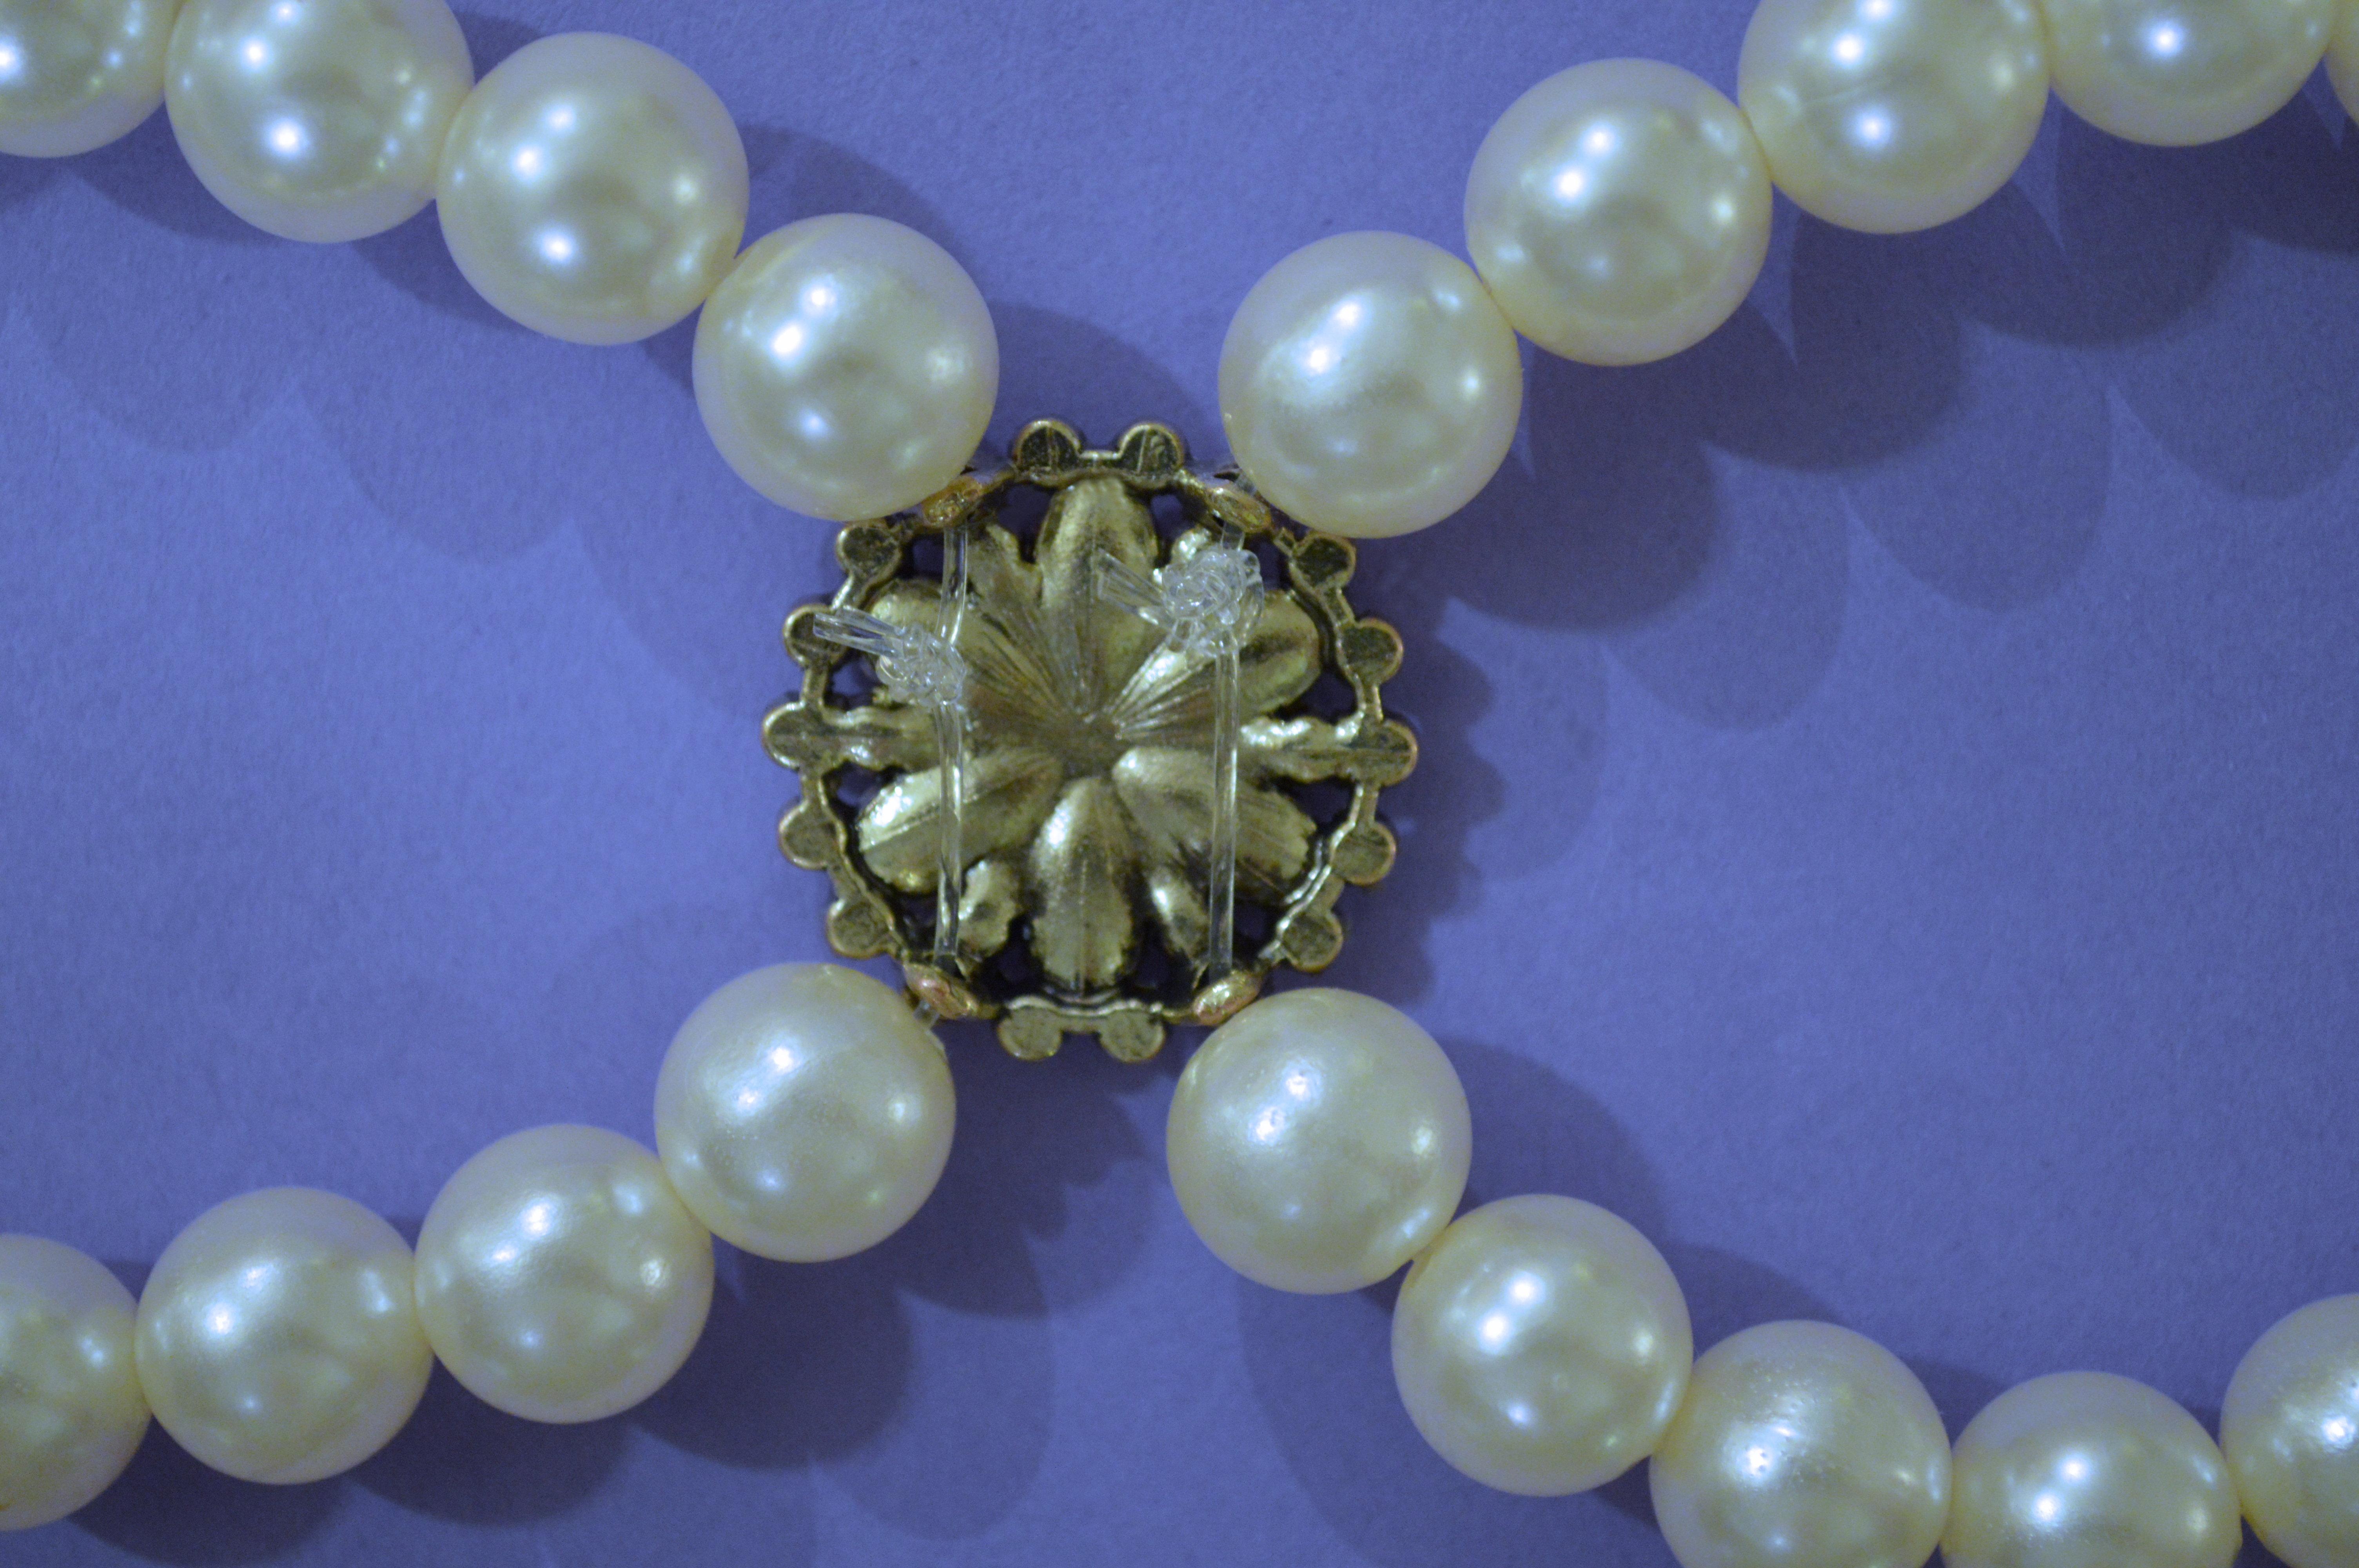
Use wire cutters to snip your chain into two equal pieces. Take one end and attach it to your beaded embroidery floss. To do so, wrap the floss around the last chain link a few times, then thread it back through the pearl and half-way through the rhinestone. Tie the knot on the backside of the rhinestone so it is not visible from the front. Make sure to triple knot.

To tie off the other end, wrap the floss around the last link on the second piece of chain. Tie a knot between the chain and the pearl, making the bead as close to the chain as you can. This will leave you with a visible floss tail sticking out of the side.
Snip the extra floss so it is just a bit shorter than the pearl.

Grab your glue and dab the end of the extra floss. Thread this into the pearl with your fingers (use glue that you’re comfortable getting on and washing off of your skin, or grab those gloves) and leave to dry. This won’t necessarily keep the pearl permanently over the knot, but it should keep the extra thread from popping out.
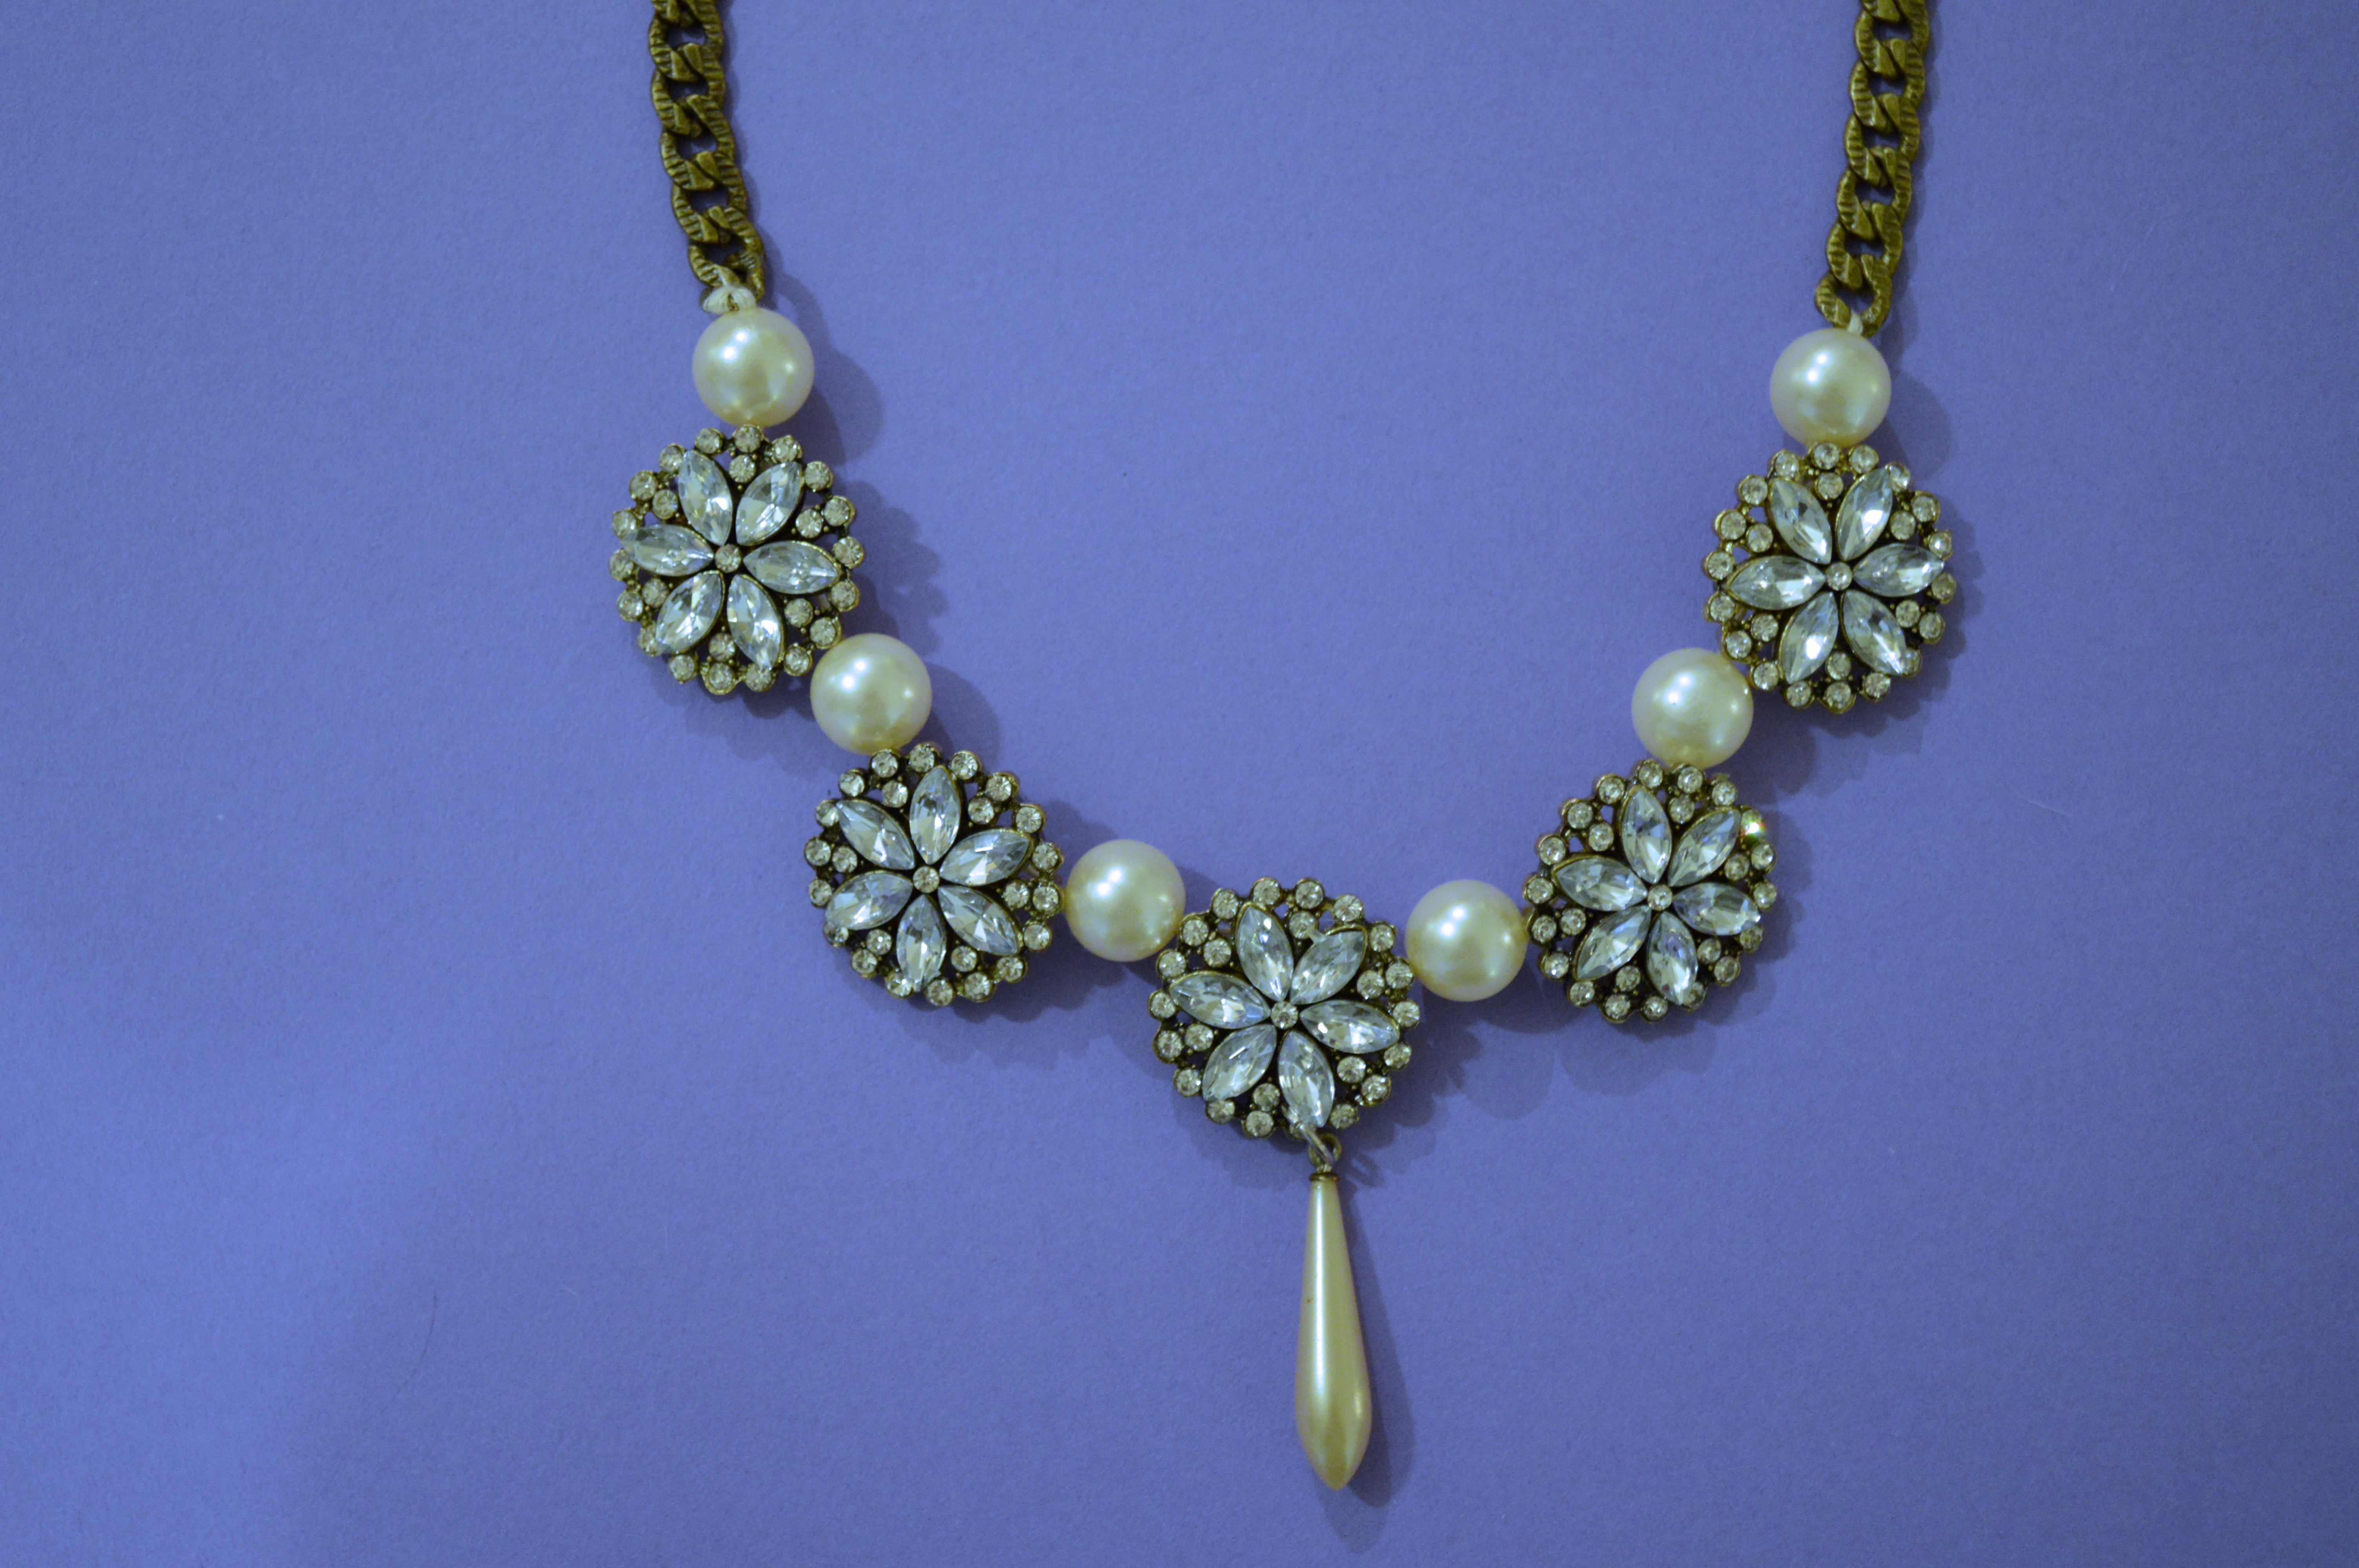
Use jump rings to attach a clasp on the other two ends of the chain. Take your third jump ring and attach the drop pearl from the middle of the center rhinestone.
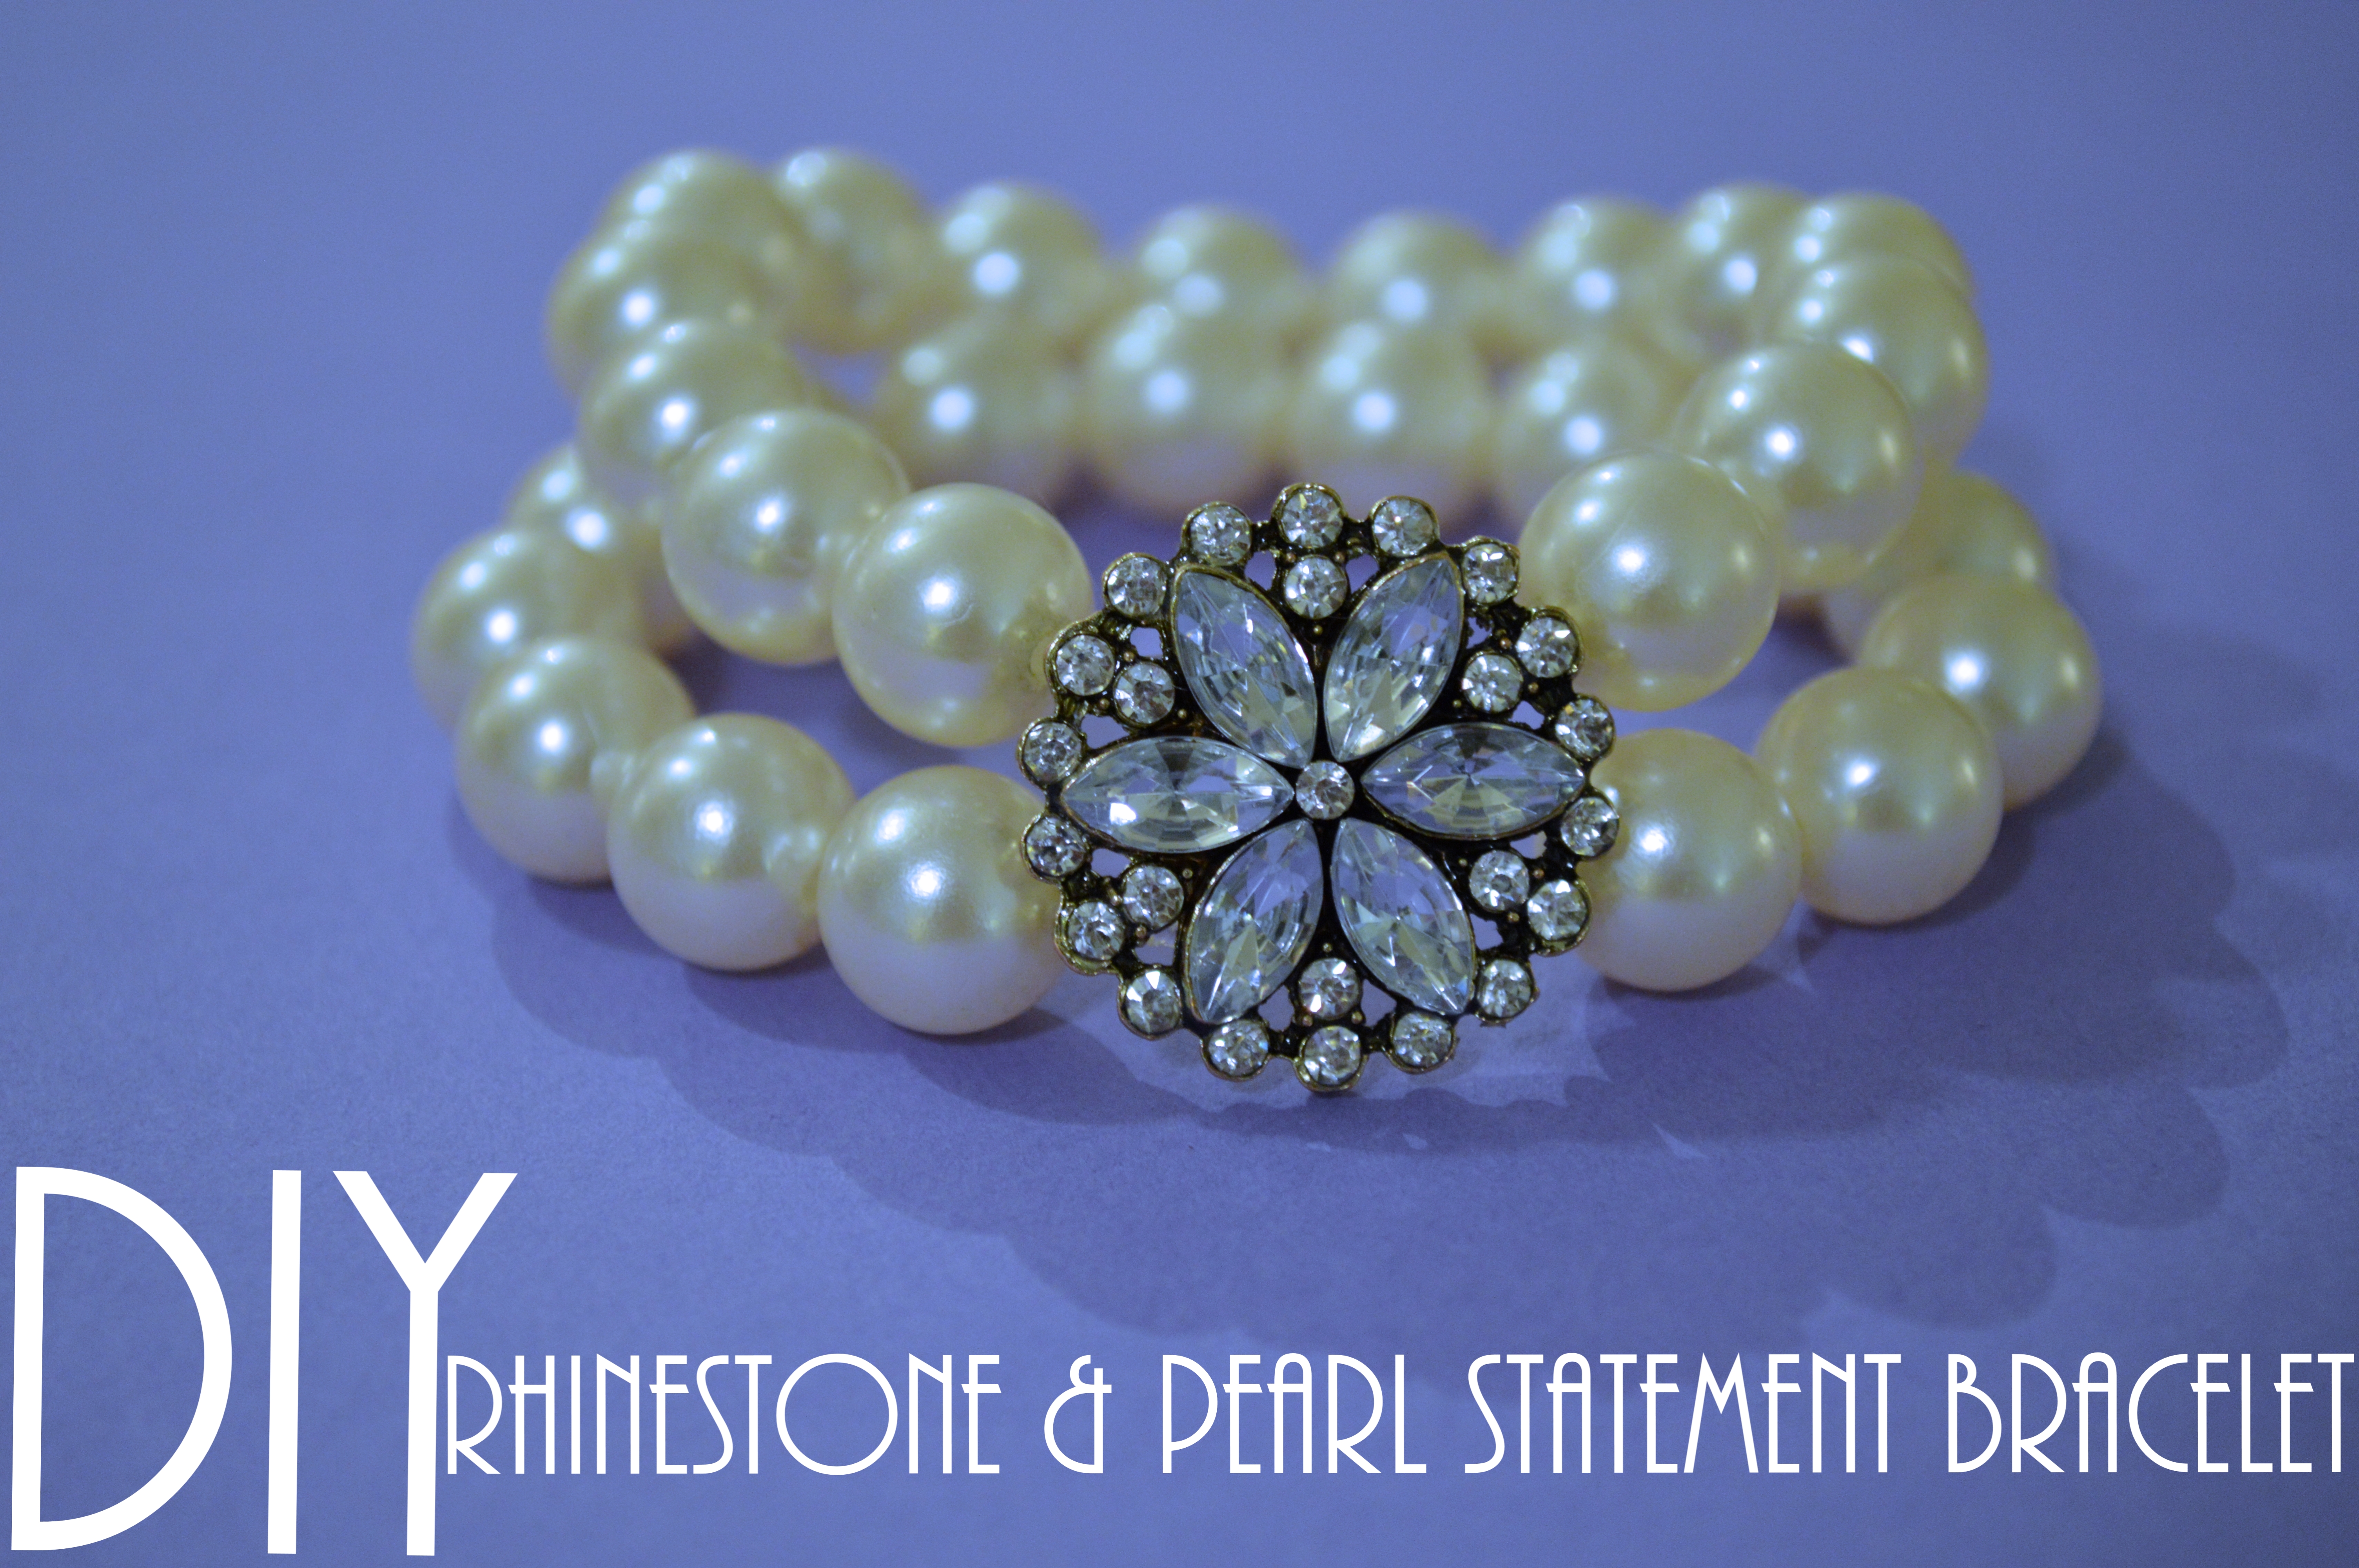
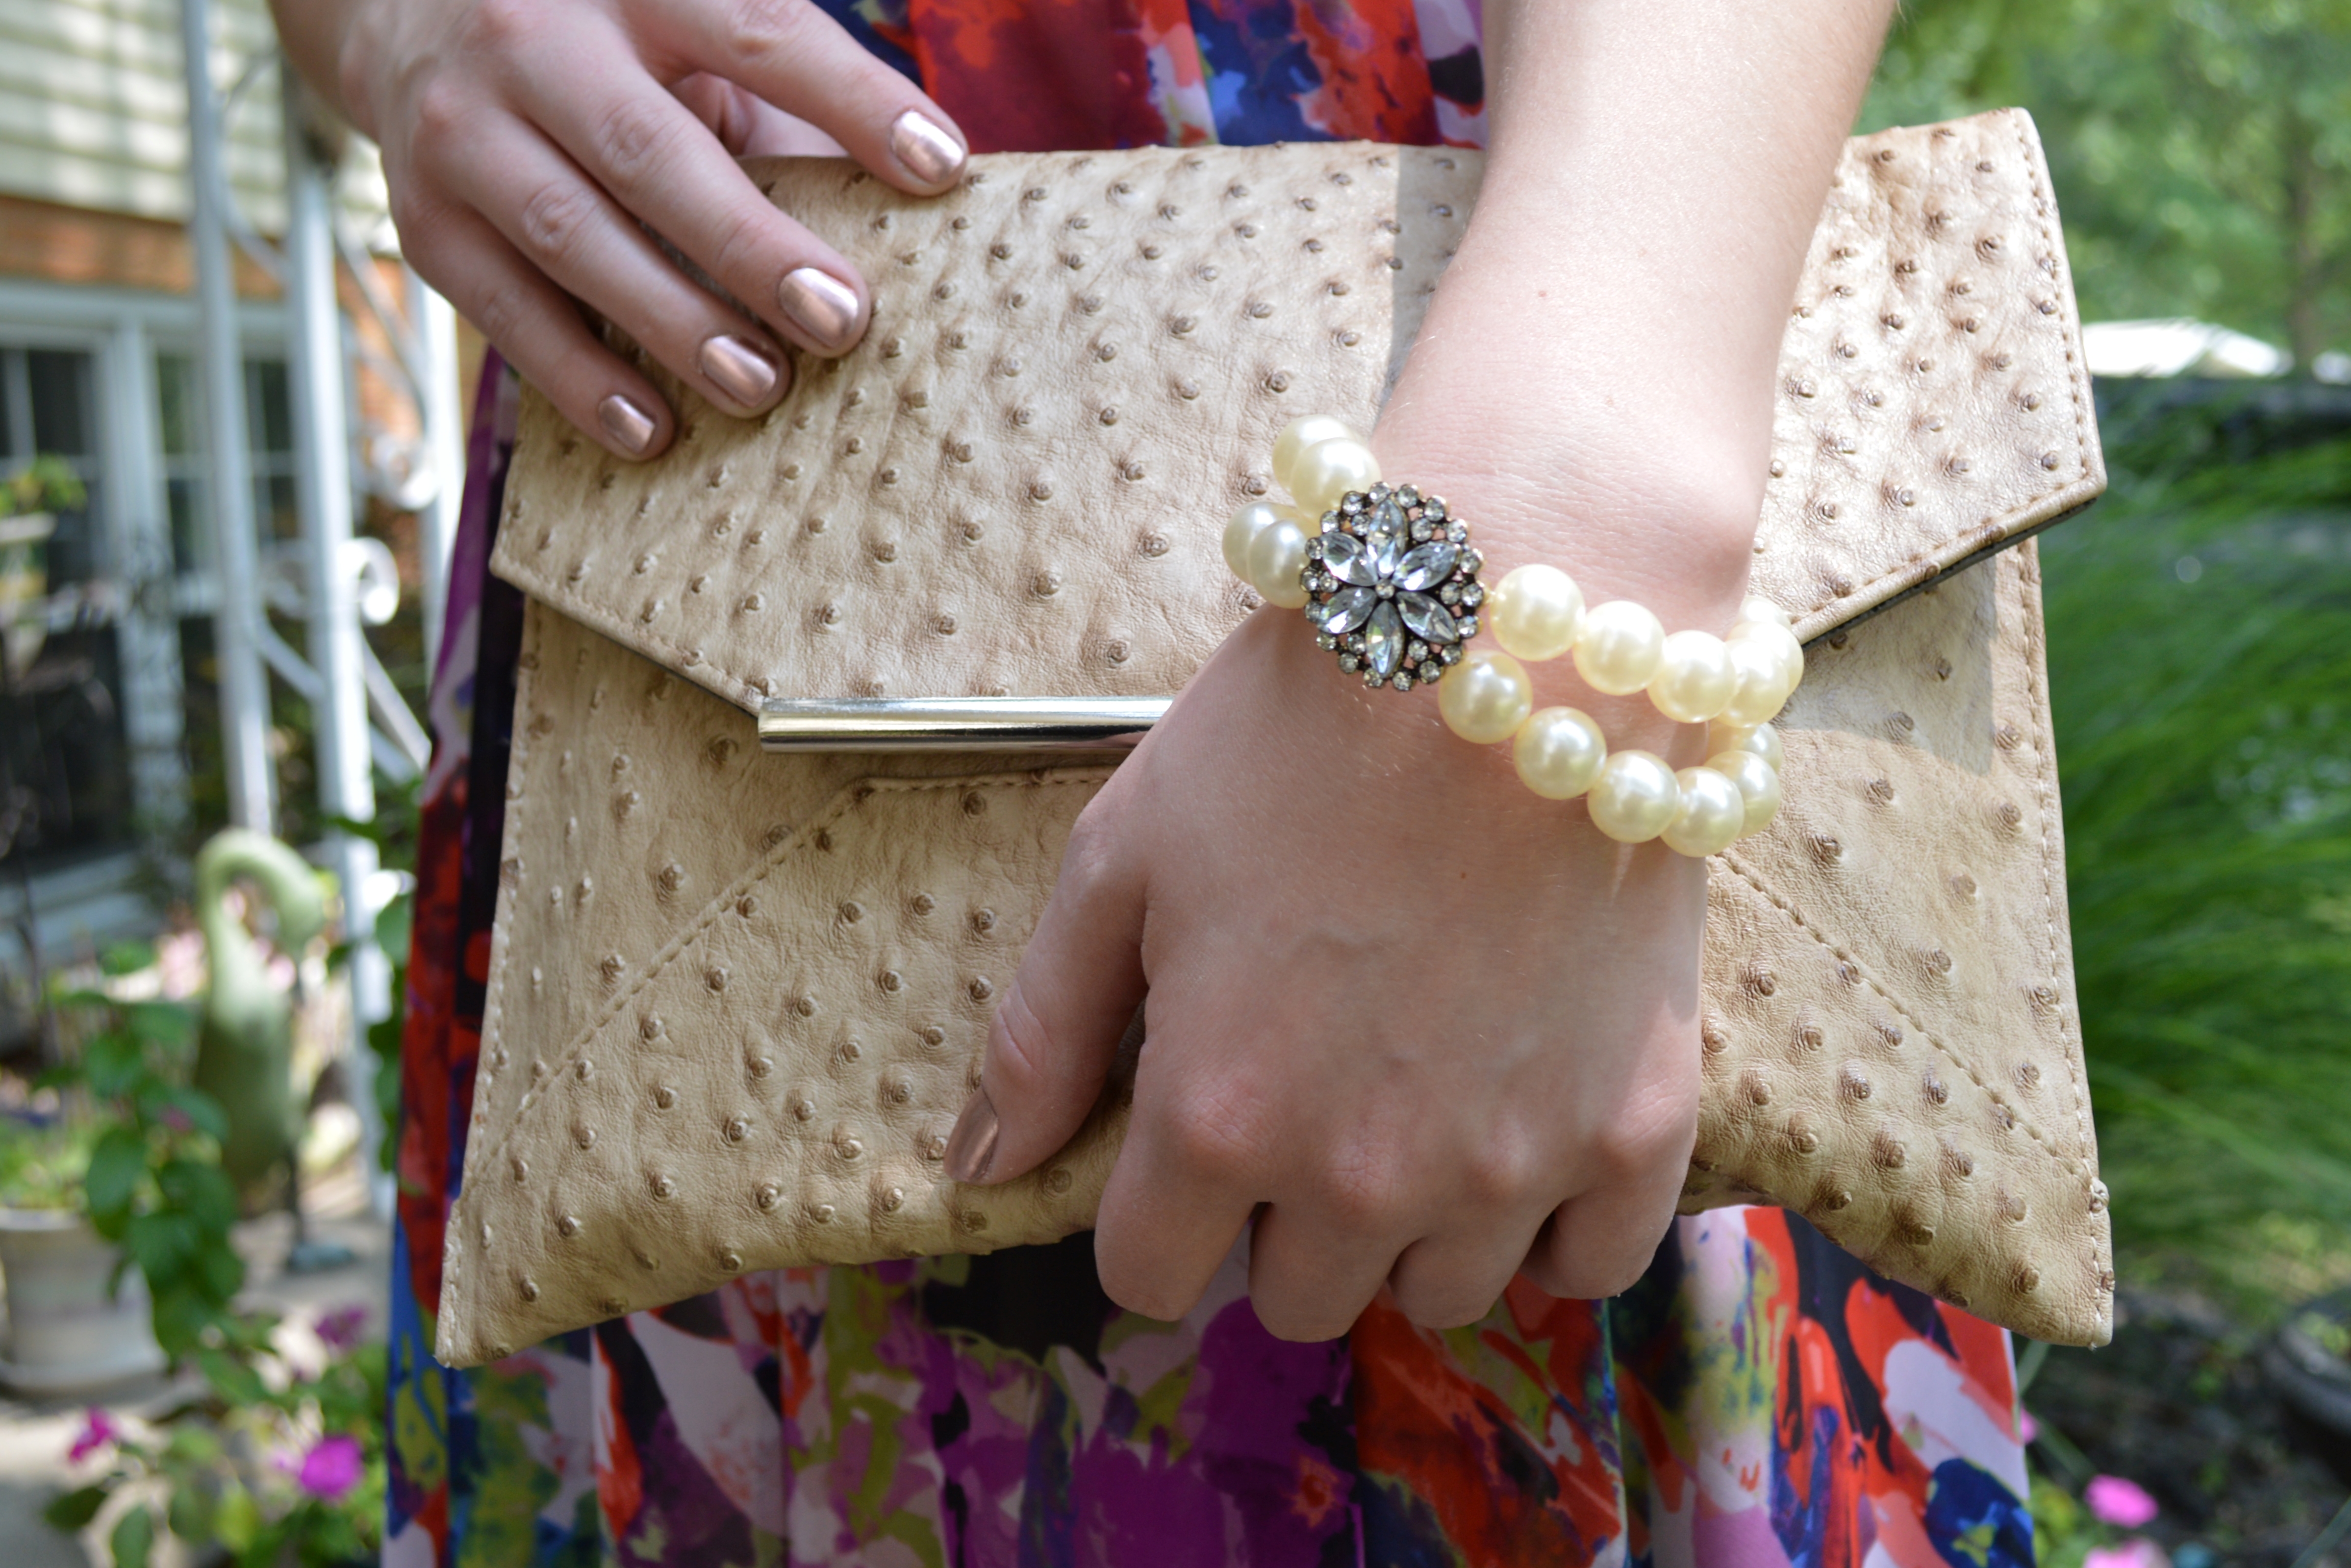
You’ll have a few extra pieces, so if you’re in the mood, use them to make a matching bracelet.
You’ll Need…
Jewelry elastic
Plastic pearls (enough to wrap around your wrist twice)
1 Rhinestone metal slider bead
Scissors
Using jewelry elastic, thread enough pearls to wrap around your wrist. Add the rhinestone and tie the knot under it, so it is not visible from the front.
Repeat the process, making a second strand of pearls. Thread it through the second set of rhinestone loops, and tie off in the same place.
On to the next craft! Happy weekend.
Don’t forget to vote in the Saint Louis Fashion Blog Awards! Oh, Julia Ann is nominated in five categories. Go to STLFW.com, click BLOGGERS, then VOTE NOW. Voting closes soon. Thank you for your support!


Where do the rhinestones come from or do you make them?
I am love, love, loving this bracelet!!! I am heading to Michael’s in the morning and I am going to be wearing this before dinner time. I am excited!!!!!!!
Amazing to me how you just “threw” this together in an HOUR, with no pattern, just a imagination of a disign that came to fruition! Talent I’ll say! You instructions are very easy to understand and follow. I couldn’t figure out how to do it correctly ( bead knot to slider piece) UNTIL I saw your pic and the read it! Thank you thank you thank you! And it looks like something I saw at Macy’s for 239.00! Great job!
Sorry design not the earlier. Auto correct Ughhh !
Author
Thank you, Jess! I’m so glad you like it! 🙂
I made this! Awesome design! Thank you for the process/steps! I used beading thread (instead of elastic line) and a magnetic clasp.